Momscode - Prago Technology - Project Mgmt
Lead
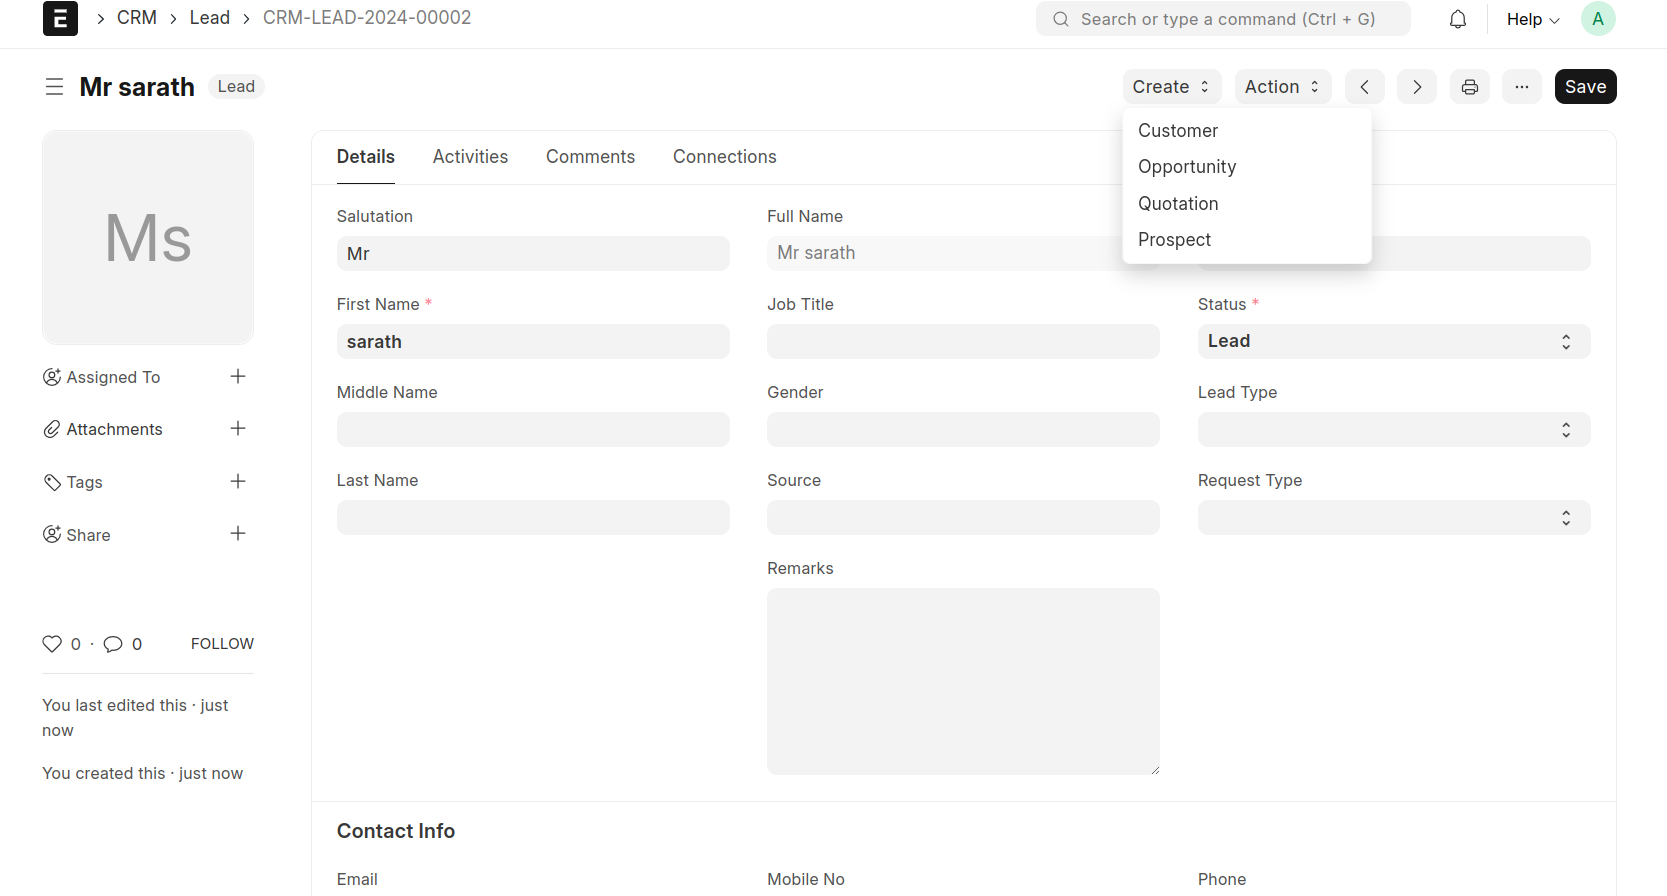
Create a Lead
Go To The Lead And Create A New Lead.
Fill The Field First Name. (Fill all fields if you need)
Save The Lead And Create 'Quotation'
when sync with google calendar check box enable in this document first save the document.
fill the fields after click the check box and save that time lead updated on google calendar
Quotation
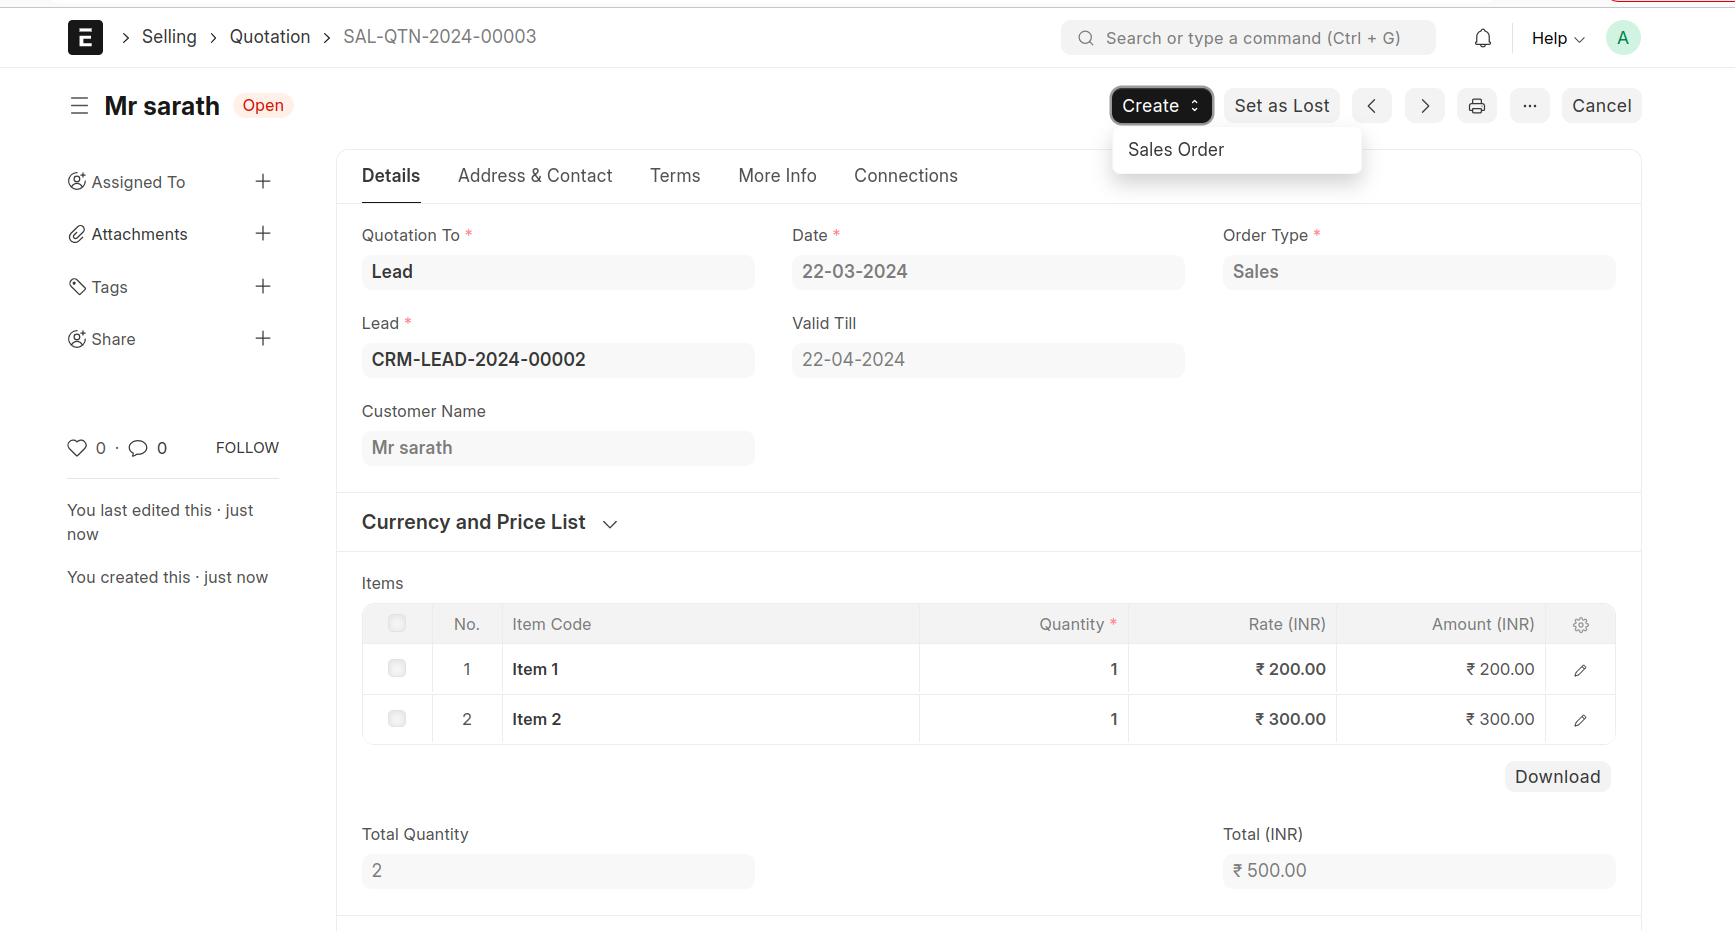
Create A Quotation
Select Item In The Items Table
Fill Quantity And Rate
Save The Quotation And Submit Then Create 'Sales Order'
Sales Order
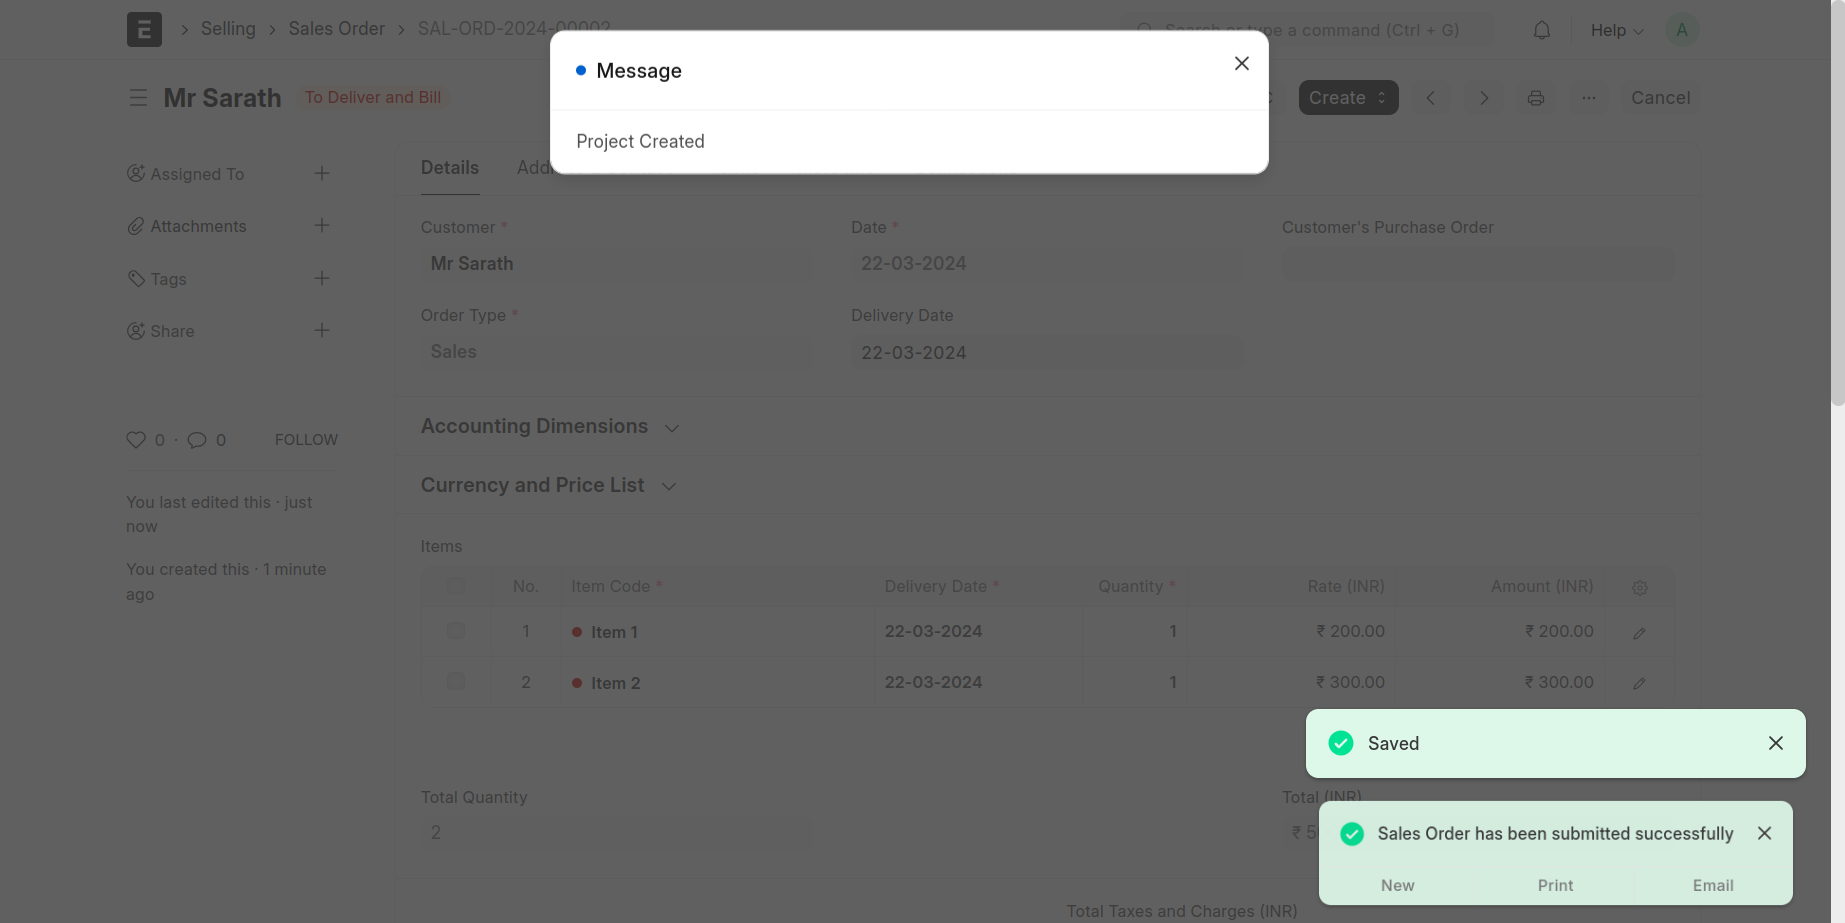
Create a Sales order
Set Delivery Date
And Save And Submit
Submit Time 'Project' will Create
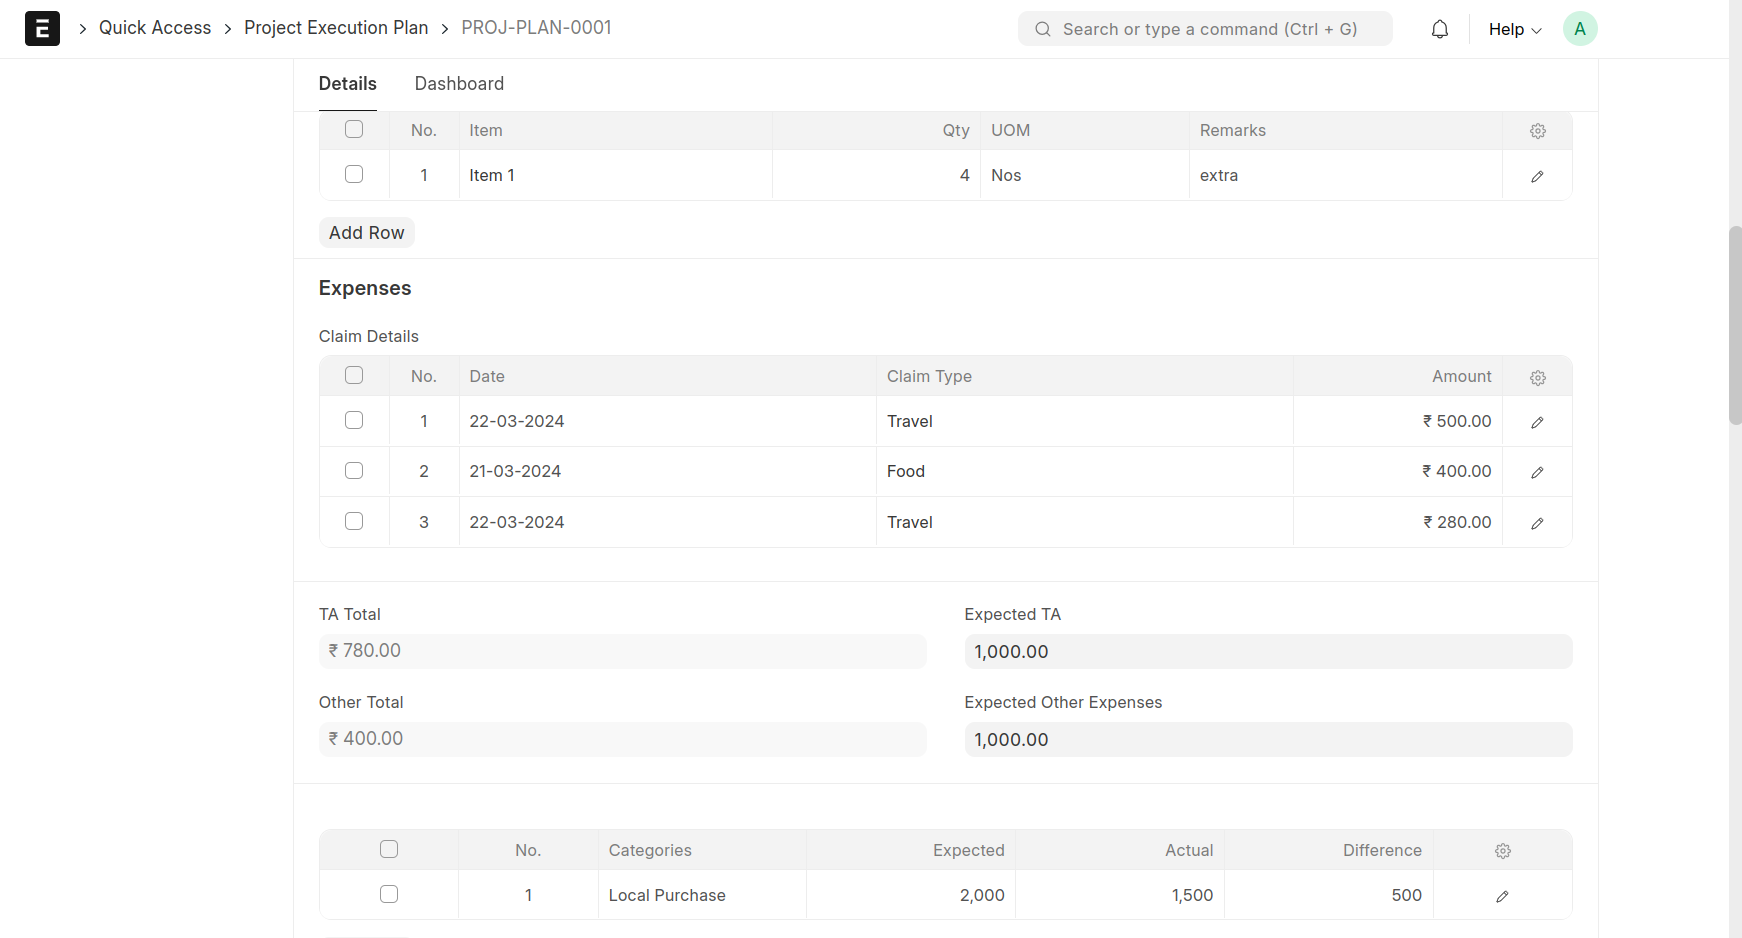
Project Execution Plan
Create A Project Execution Plan
Then Select Project- That Time Quoted Items In The Sales Order Will List In The 'Products Installed As Per Quote' Table.
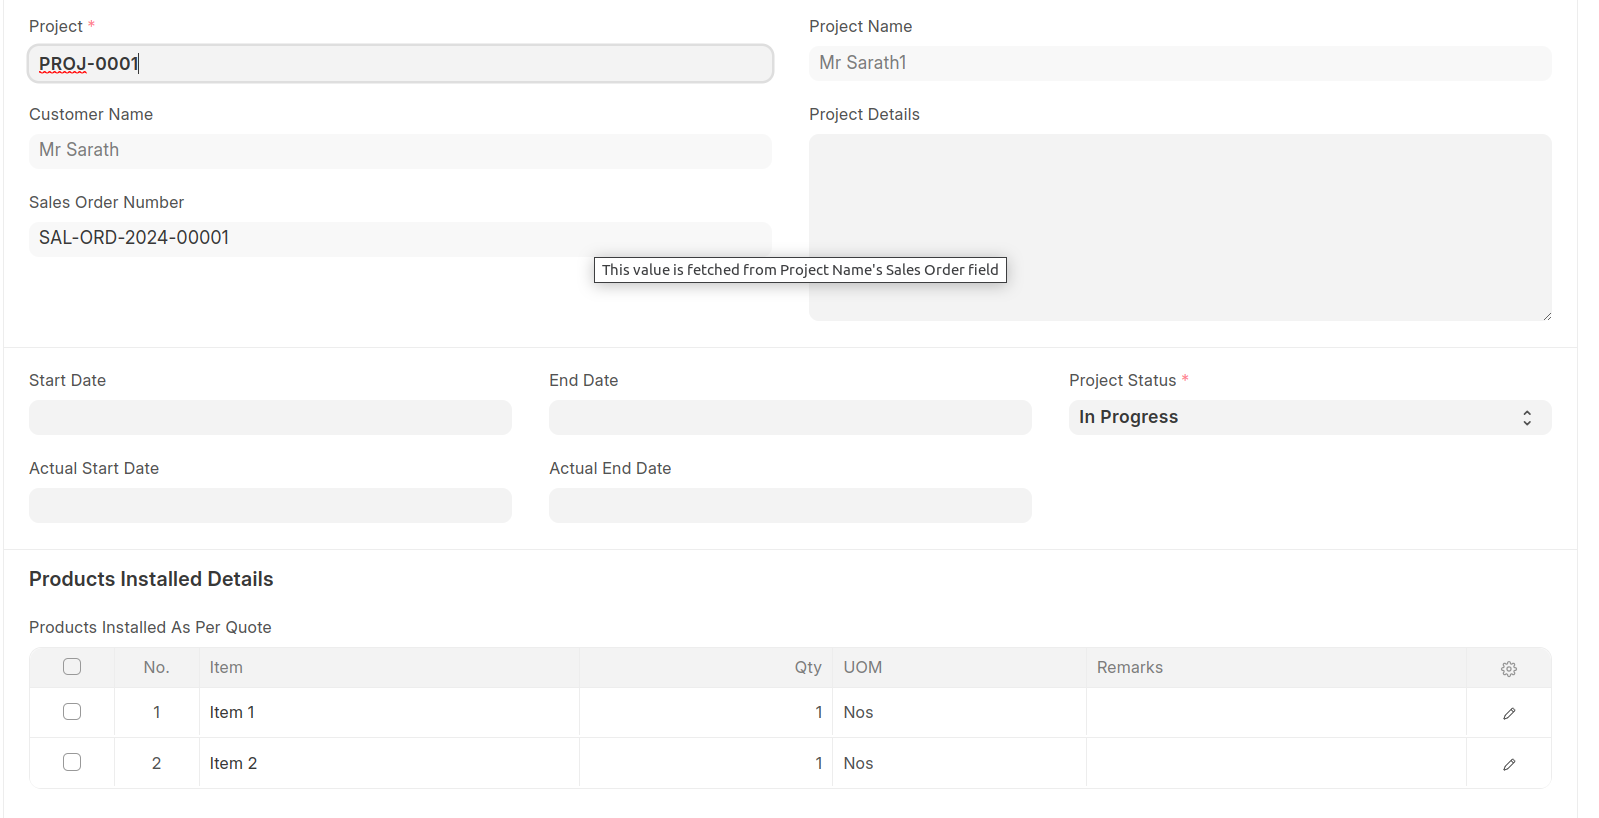
In Time Line Section-Allocate The Employee In The Project.

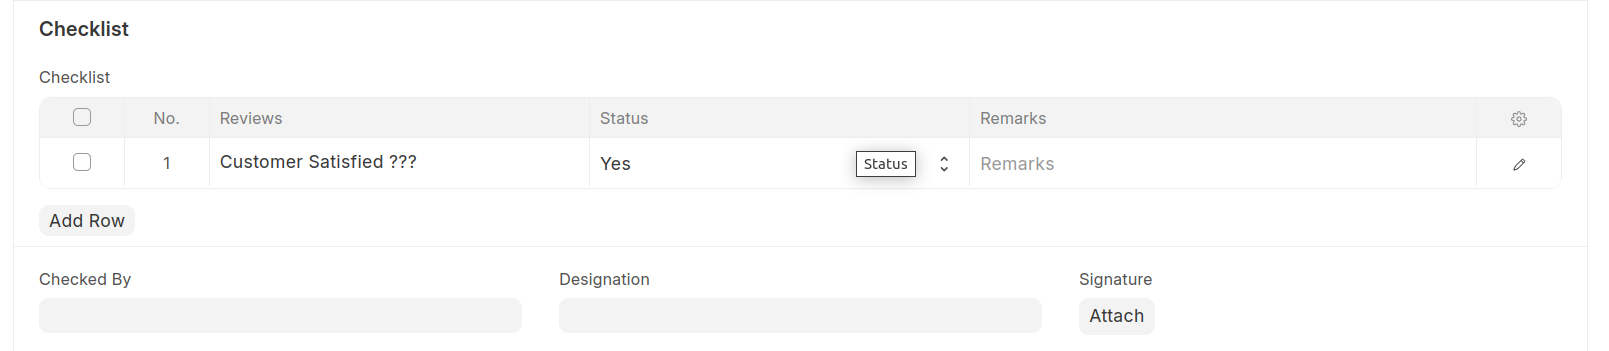
In Checklist Section List The Customer Review
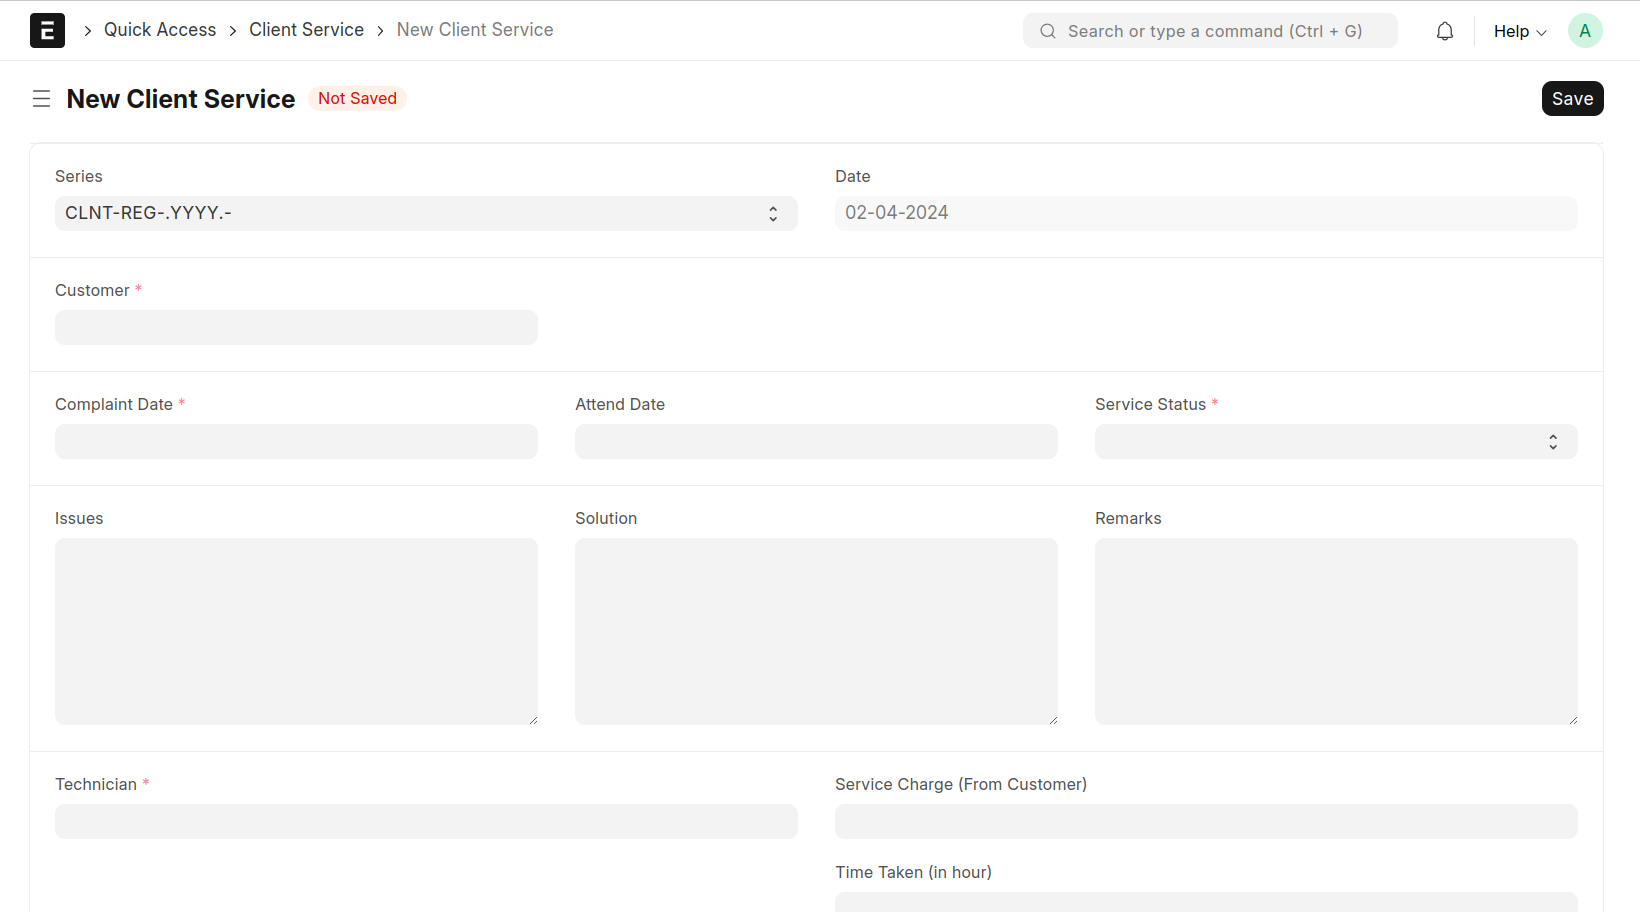
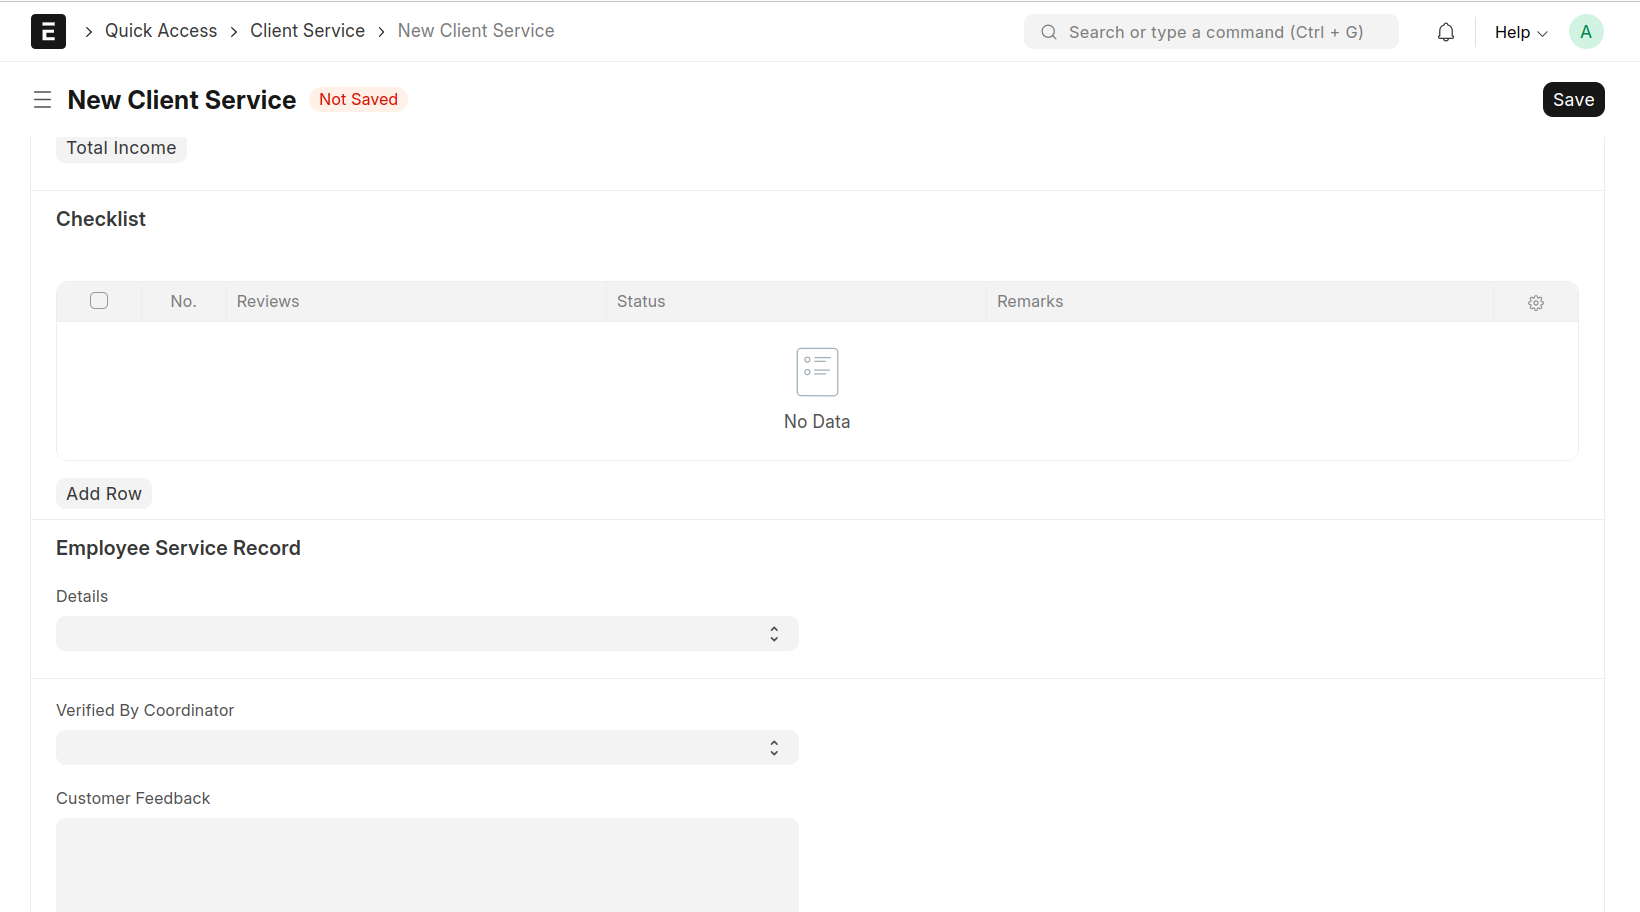
Client Service
Create A Client Service
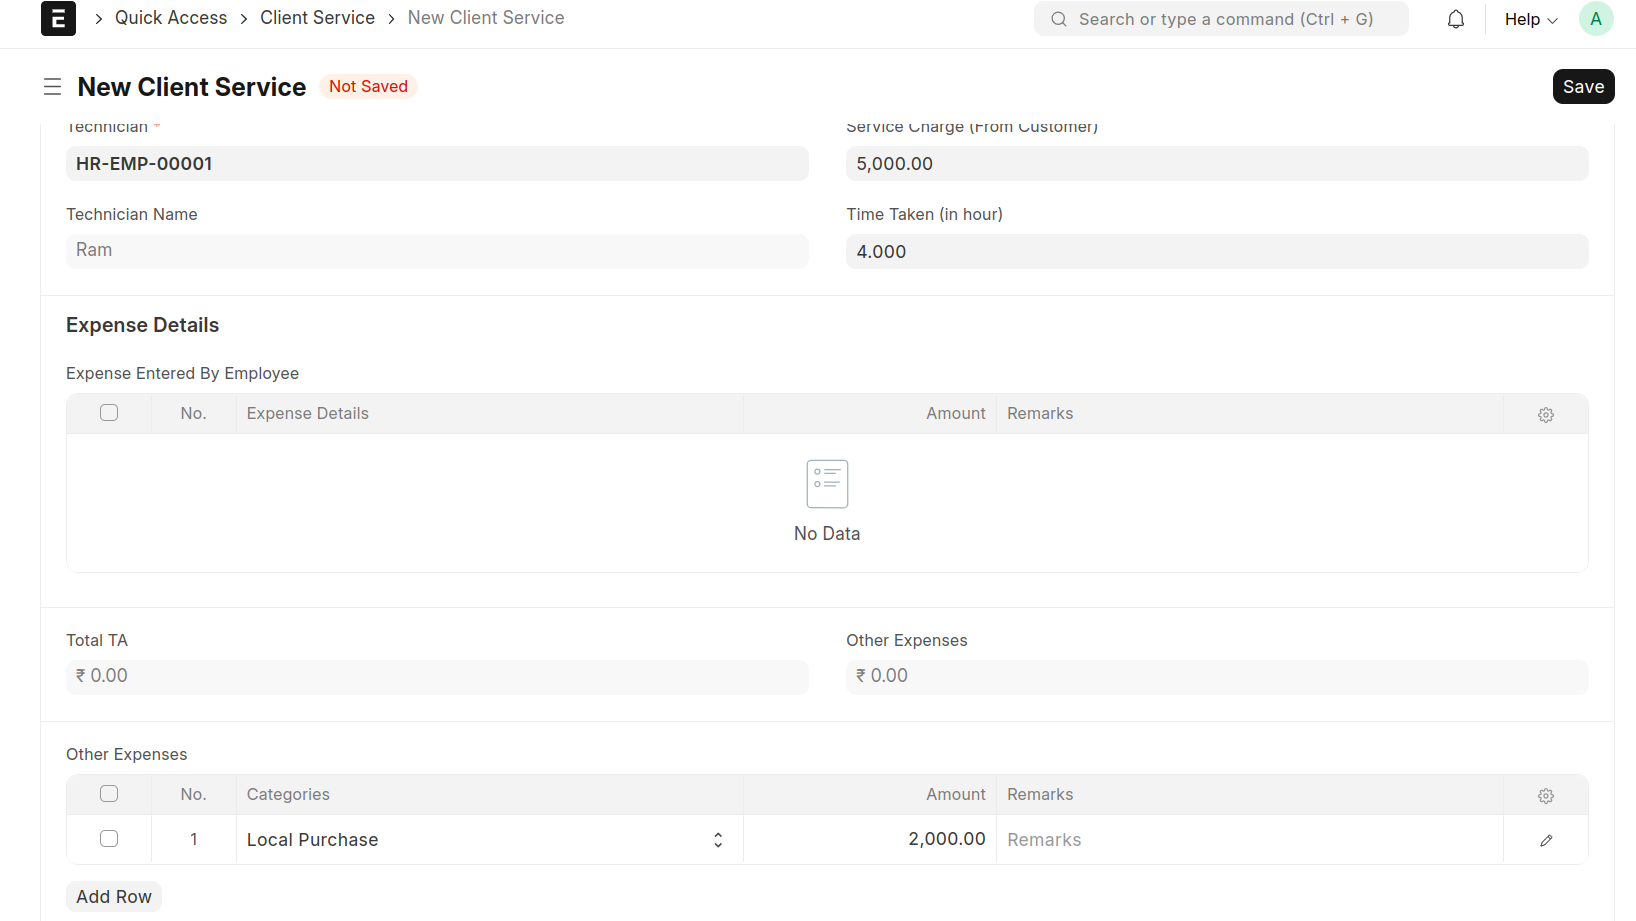
Then Select Customer. Select The Technician Which Are Allocated In The Corresponding Service. And Enter The Time Taken By The Employee To Complete That Work. Collected Amount Enter The Field 'Service Charge (From Customer)'. Fill The 'Other Expense Table' And Press The Button 'Total Income' That Time Show The Total Income.You can Also Mark The Employee Performence In That Particular Service
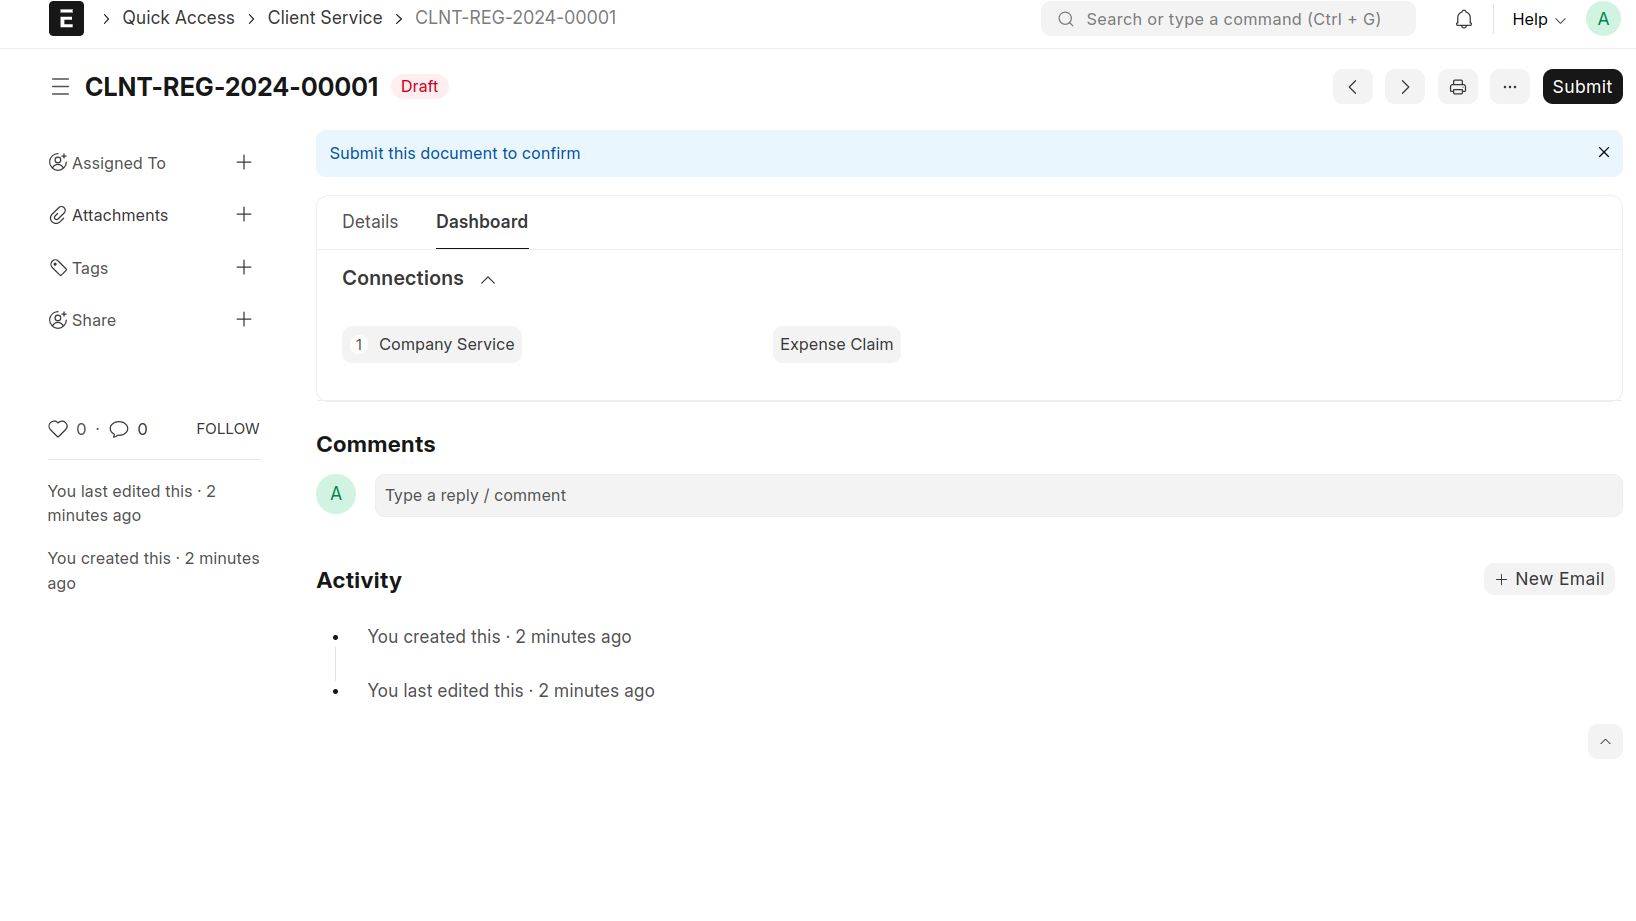
Here Status Of Project Is 'Company Support' then Save That Time New Company Service Document Is Create
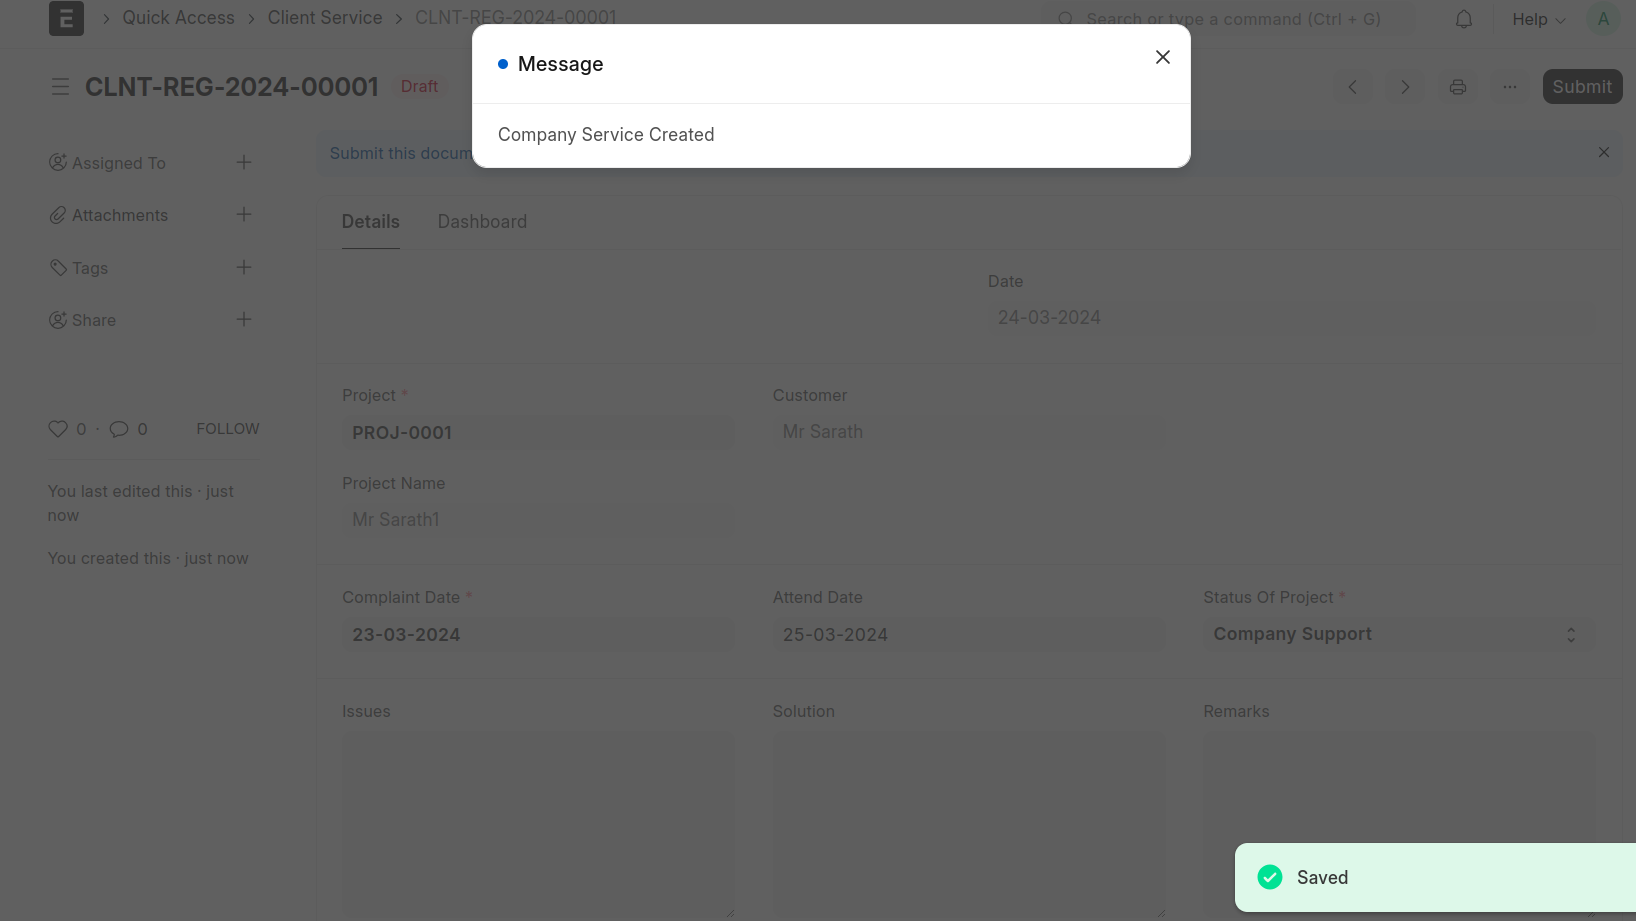
That Will Shown On The Dashboard
Here Status Of Project Is 'Completed' Then Only Submit The Document.
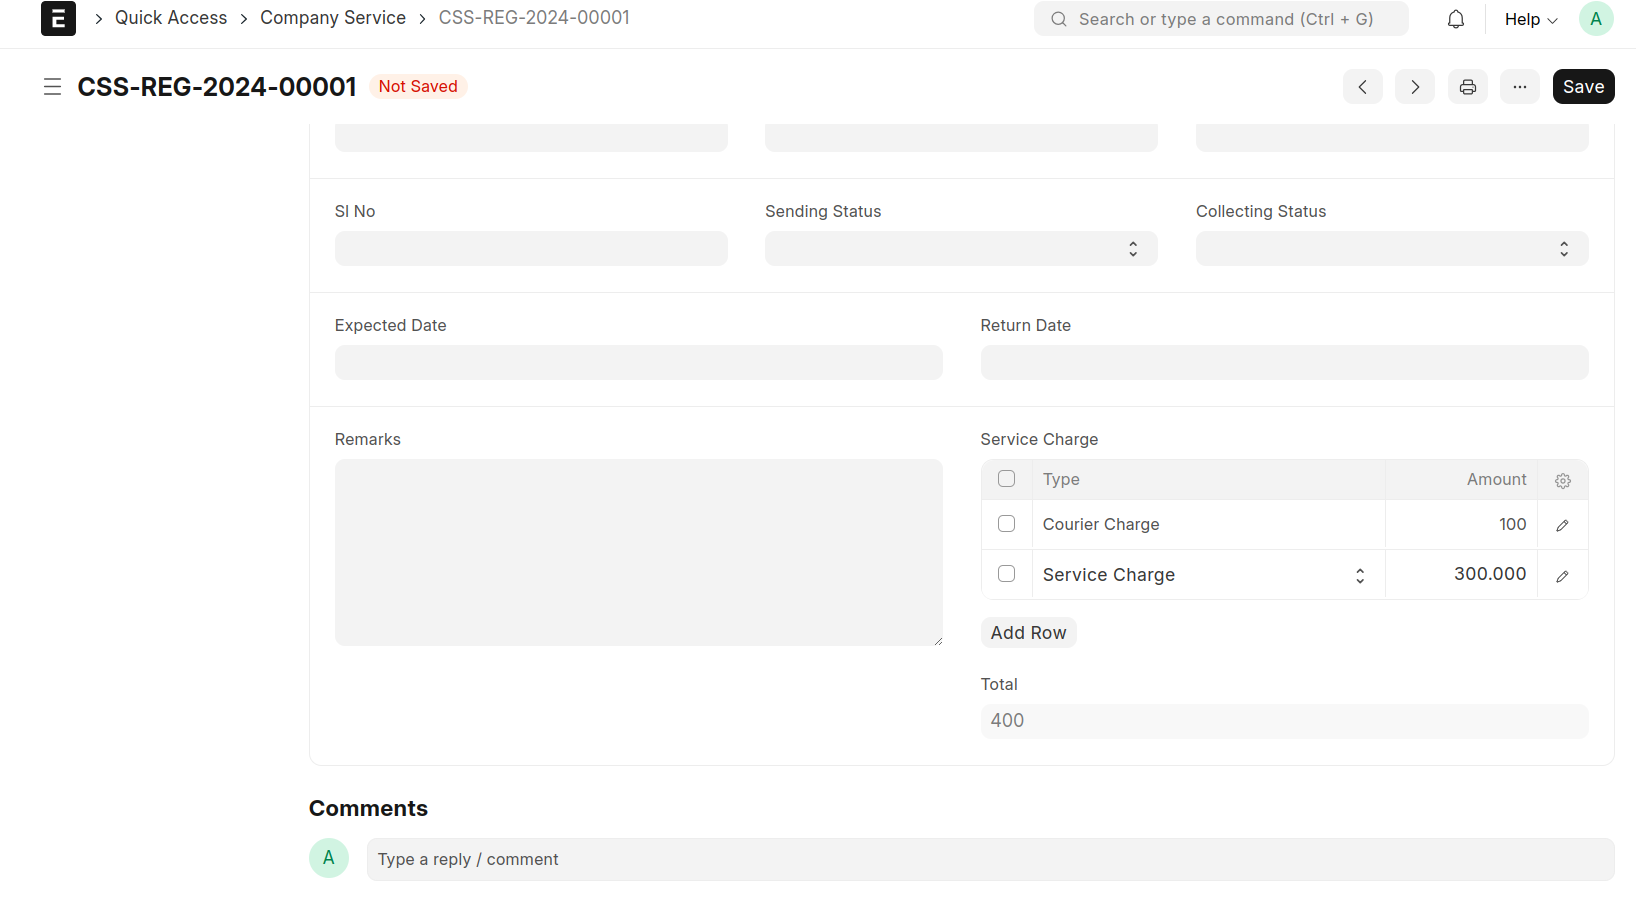
Company Service
Open Created Company Service
Fill The Item Details
Fill The Item Service Cost In The Table 'Service Charge'
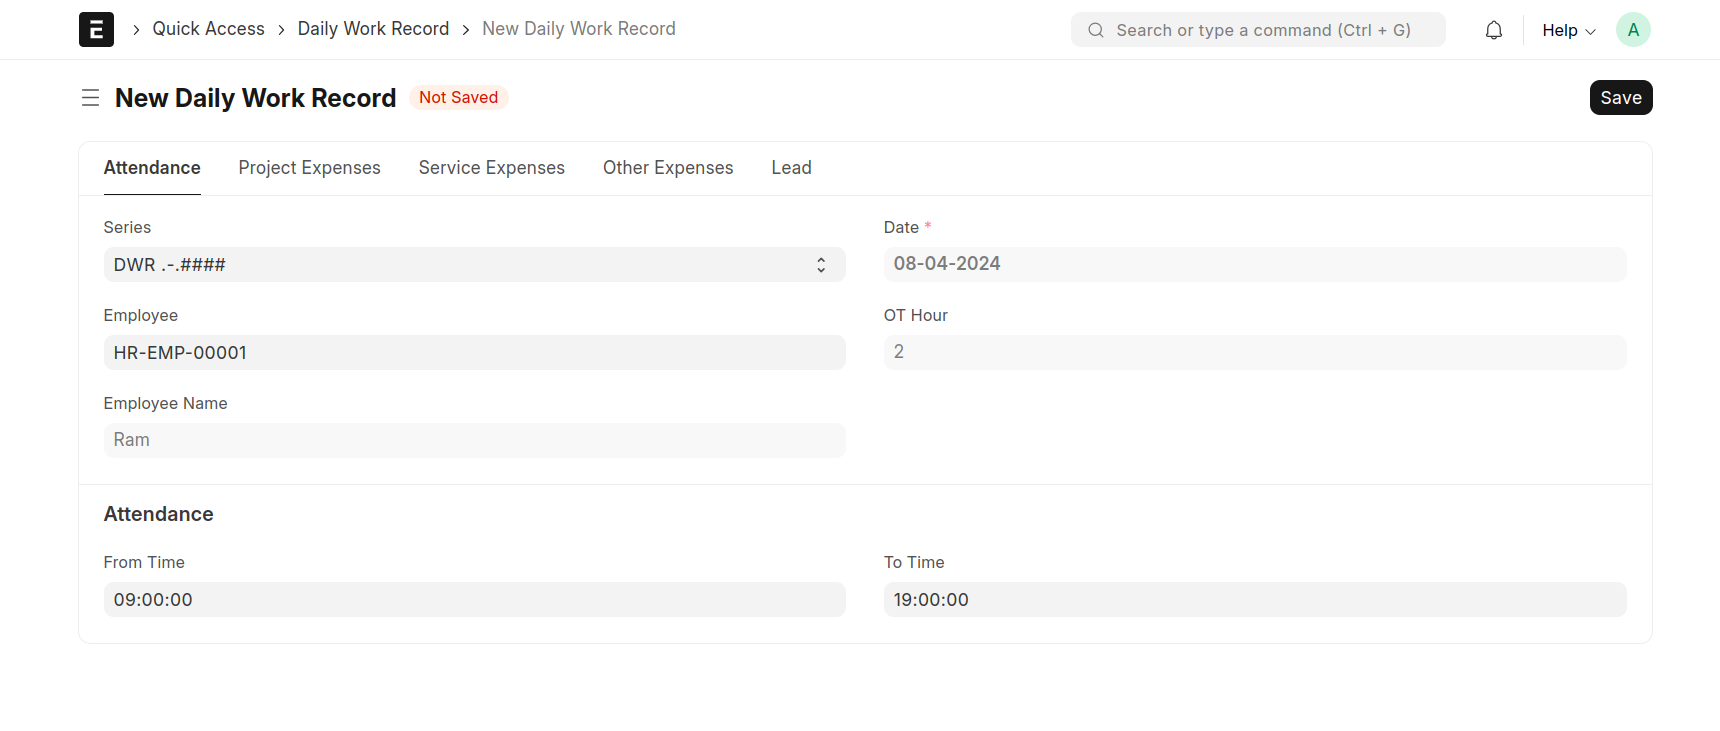
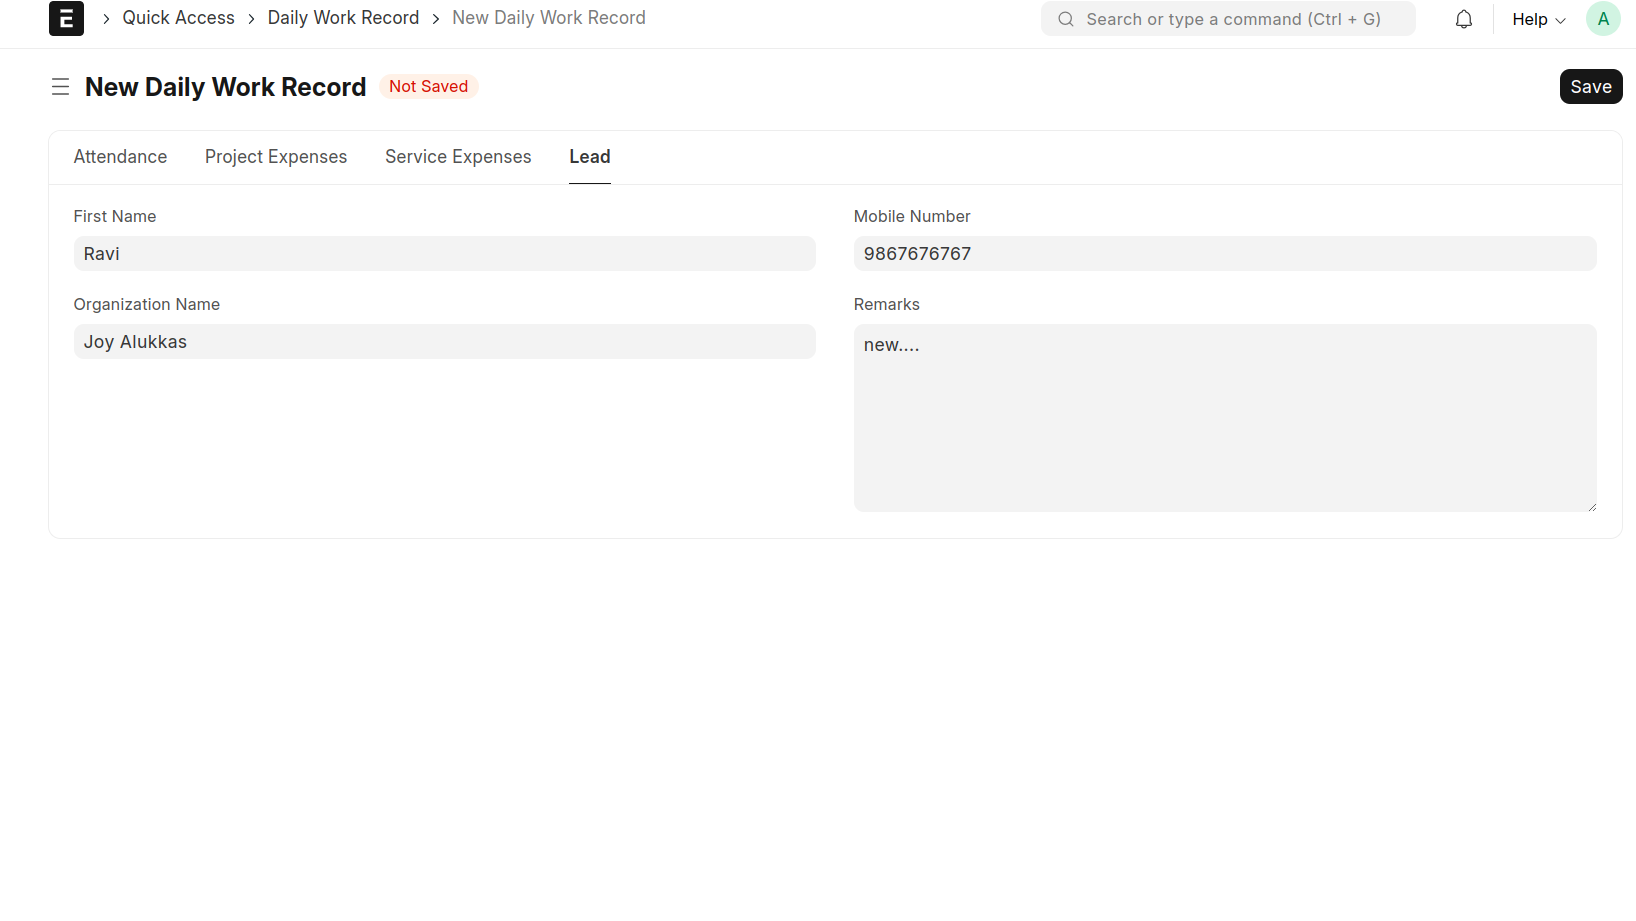
Daily Work Record
Create a Daily Work Record. This Document Is Used By Site Employees.To Mark Their Attendance,Lead and Expense Claim Details
If An Employee Wants To Mark Their Attendance Then Fill In Their Details in The Attendance Section and The Employee Mark Their Over Time Hours Throw Daily Work Record. Enter The From time And To Time That Working Hourse Is Grater Than 8 Hour Then The OT Hour Is Automatically Update.
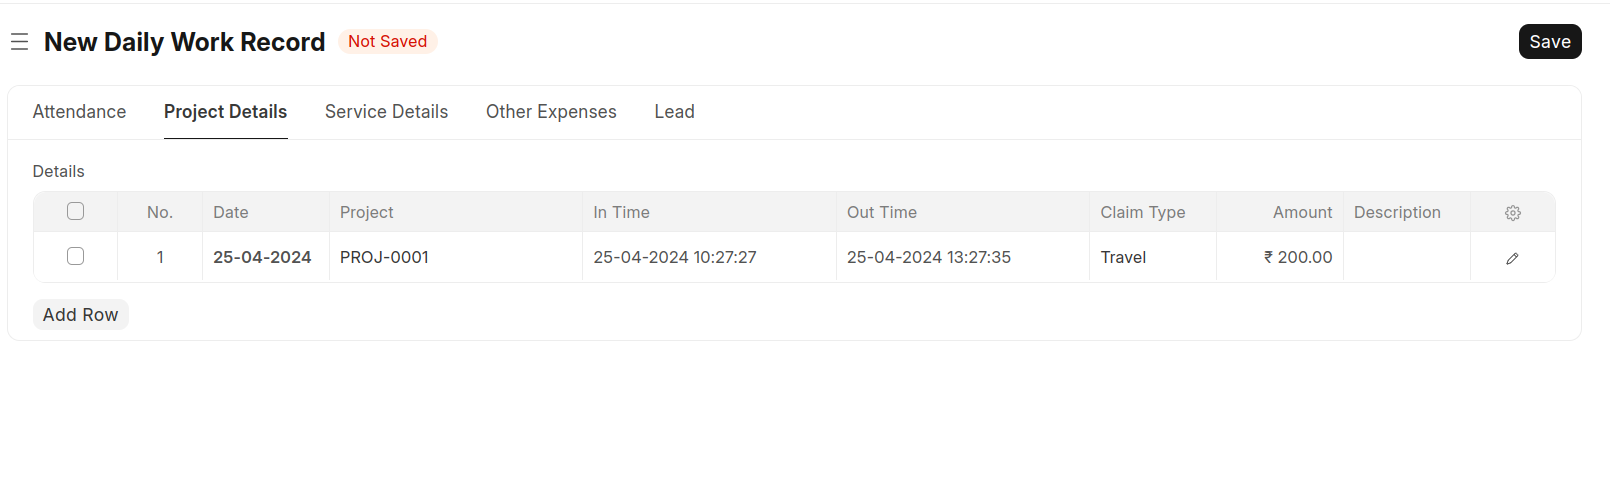
If An Employee Wants To Enter Their Project Expense Claim Details Then Fill In The project Details Section
here the employee mark their time detail. then create the timesheet
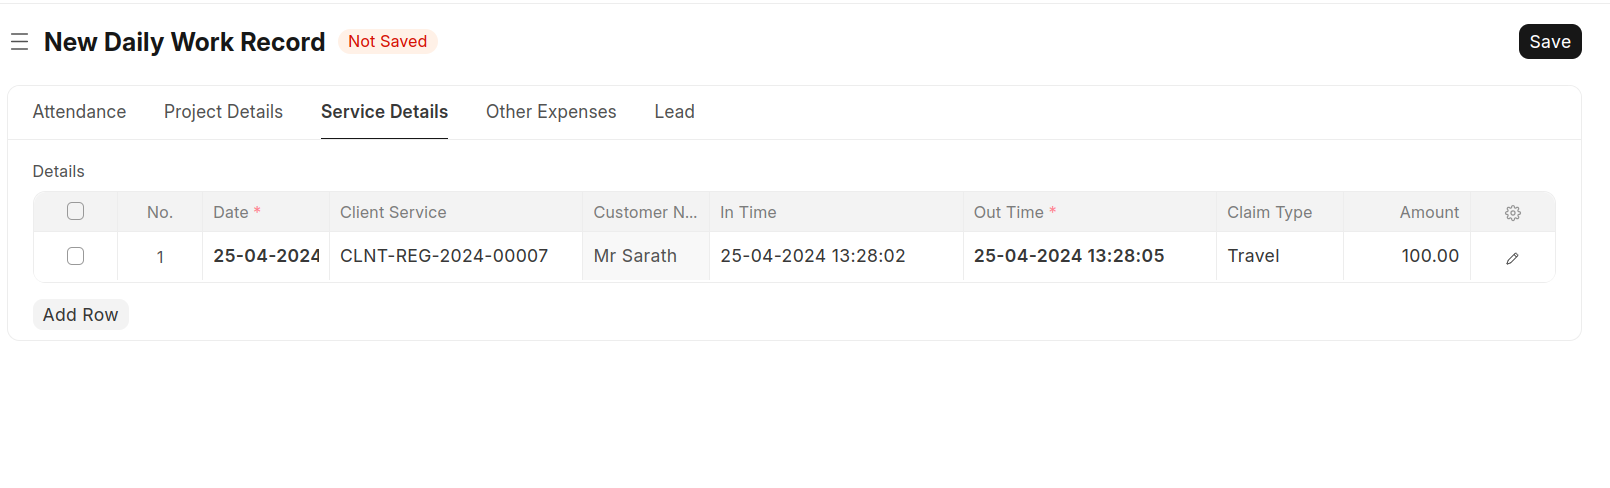
If An Employee Wants To Enter Their Service Expense Claim Details Then Fill in The Service details Section
here the employee mark their time detail. then create the timesheet
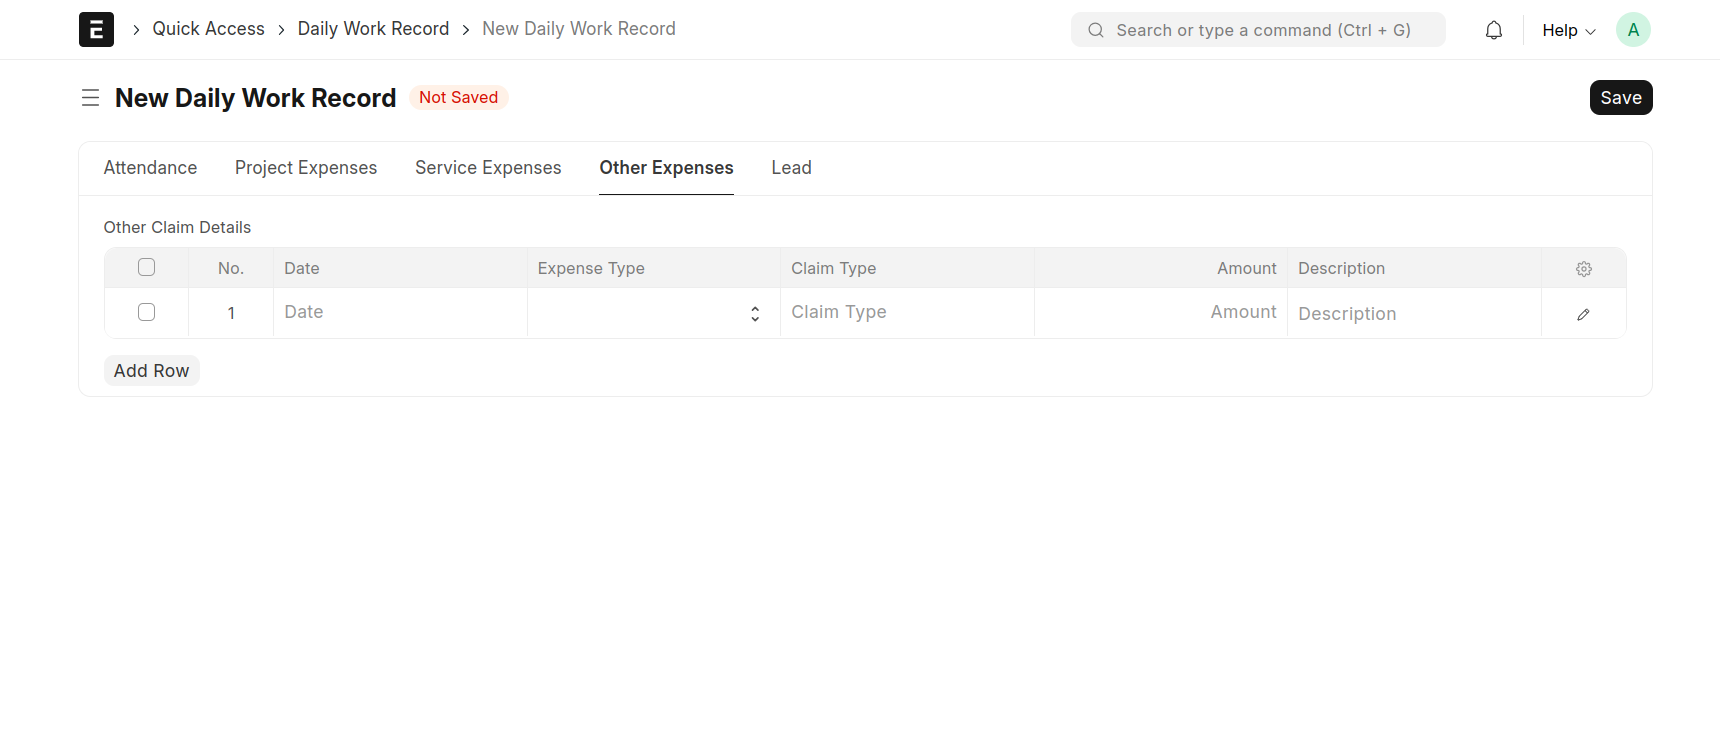
If An Sales Person Wants To Enter Their Expense Claim(Site Visit,etc) Details Then Fill in The Other Expenses Section
If An Employee Wants To Enter The Lead Details Then Use The Lead Section
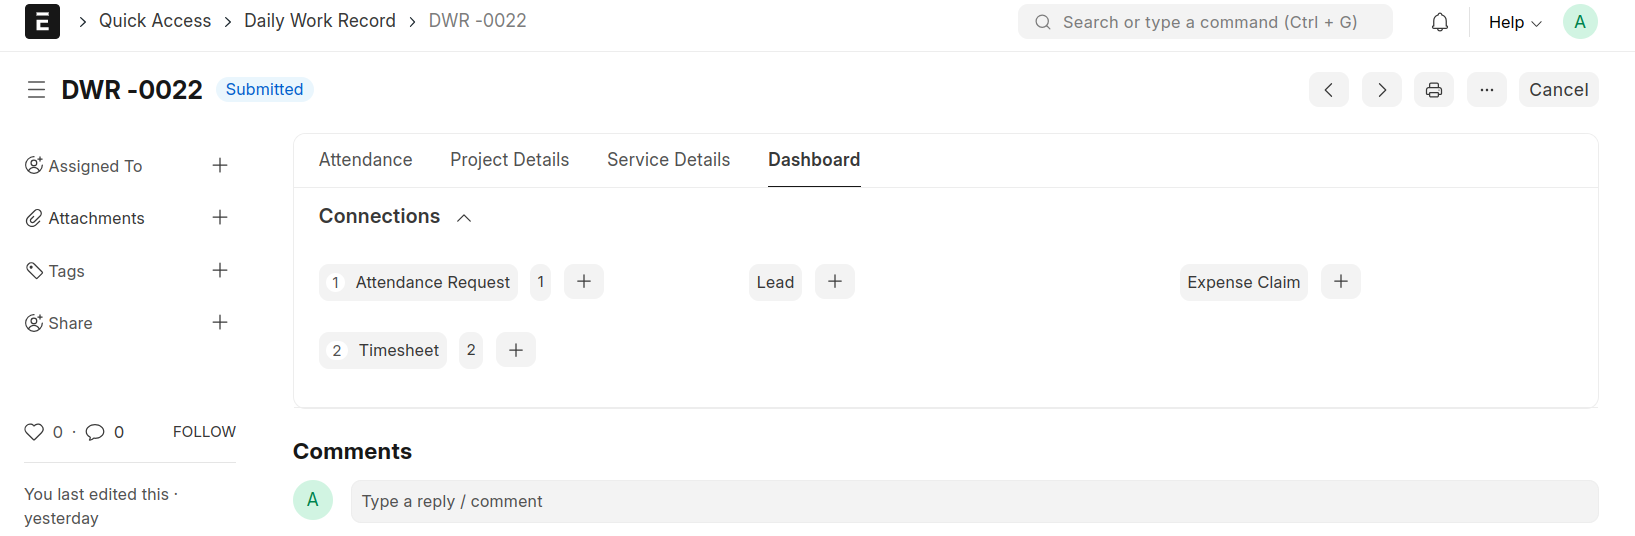
Then Save And Submit The Document Then The Corresponding Document Will Be Created
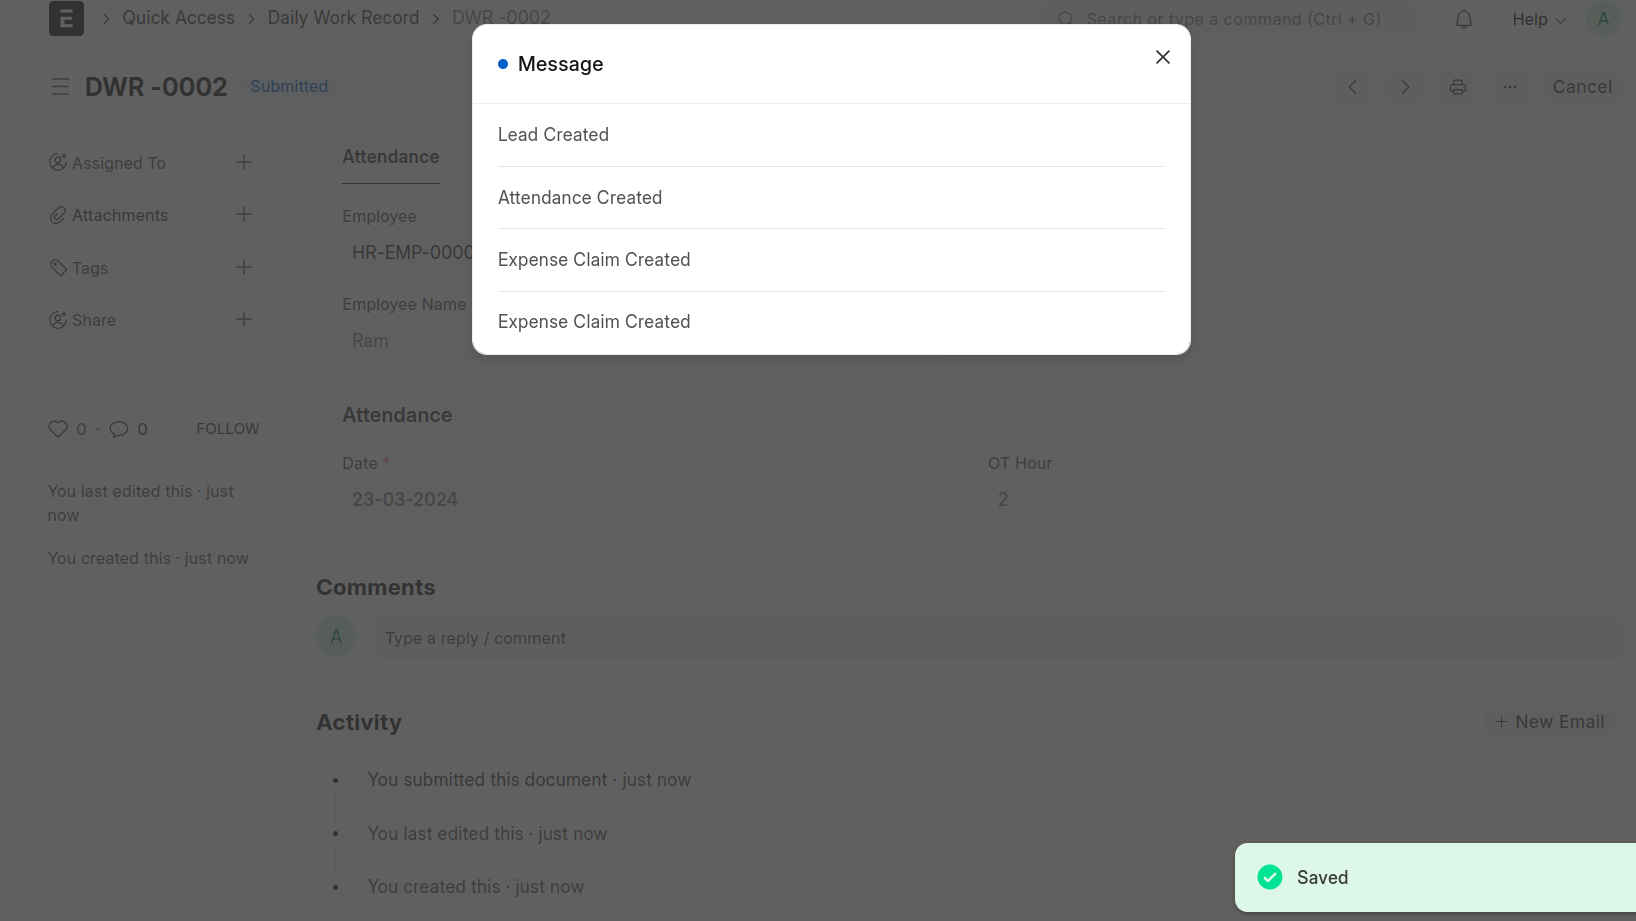
That Will Shown On The Dashboard
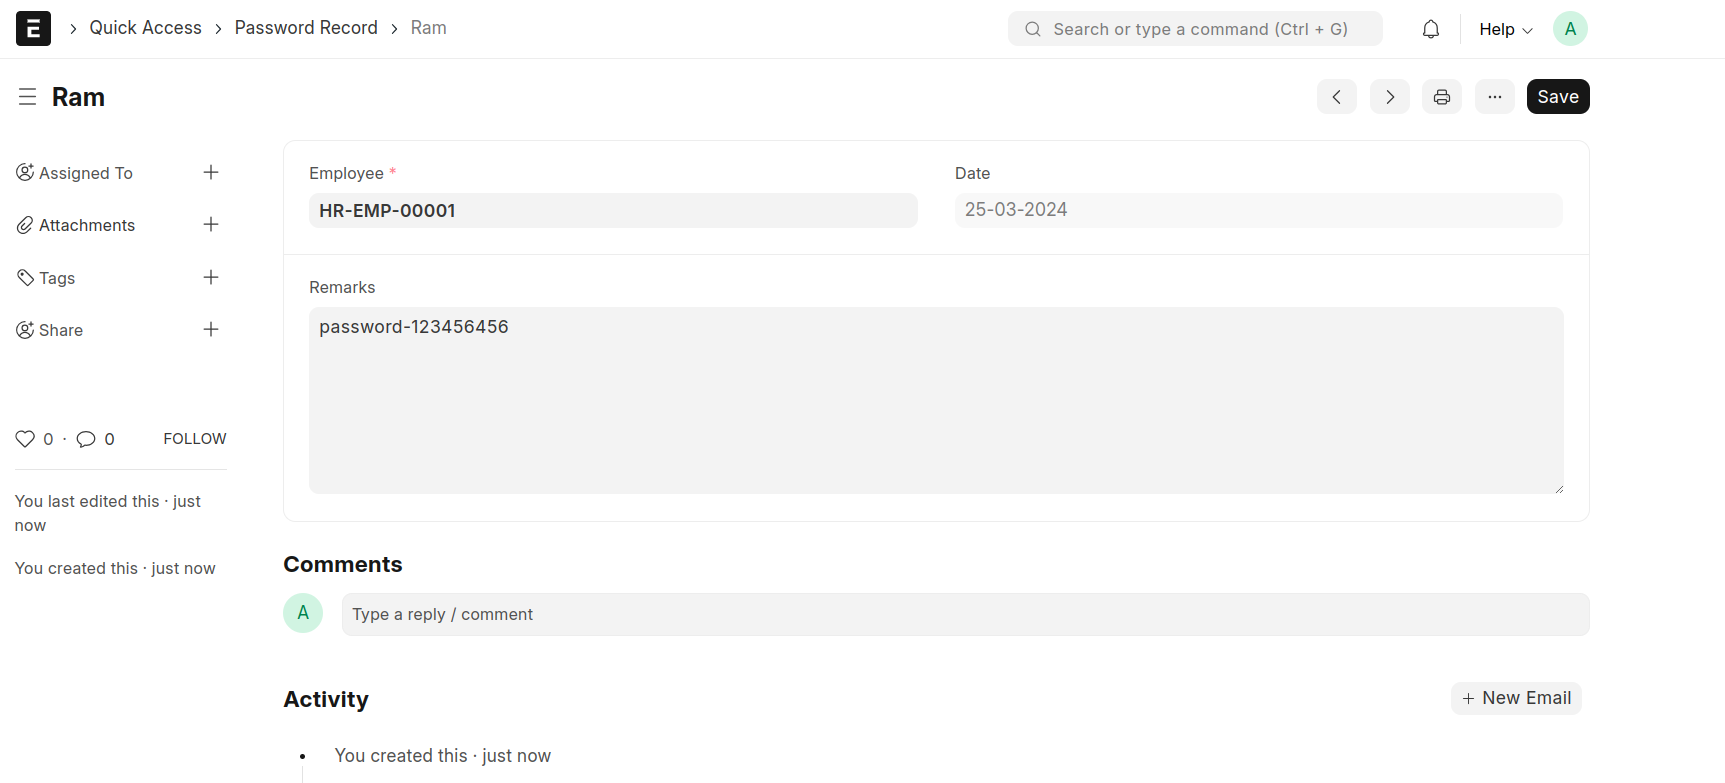
Password Record
Create A Password Record
Save The Employee Passwords
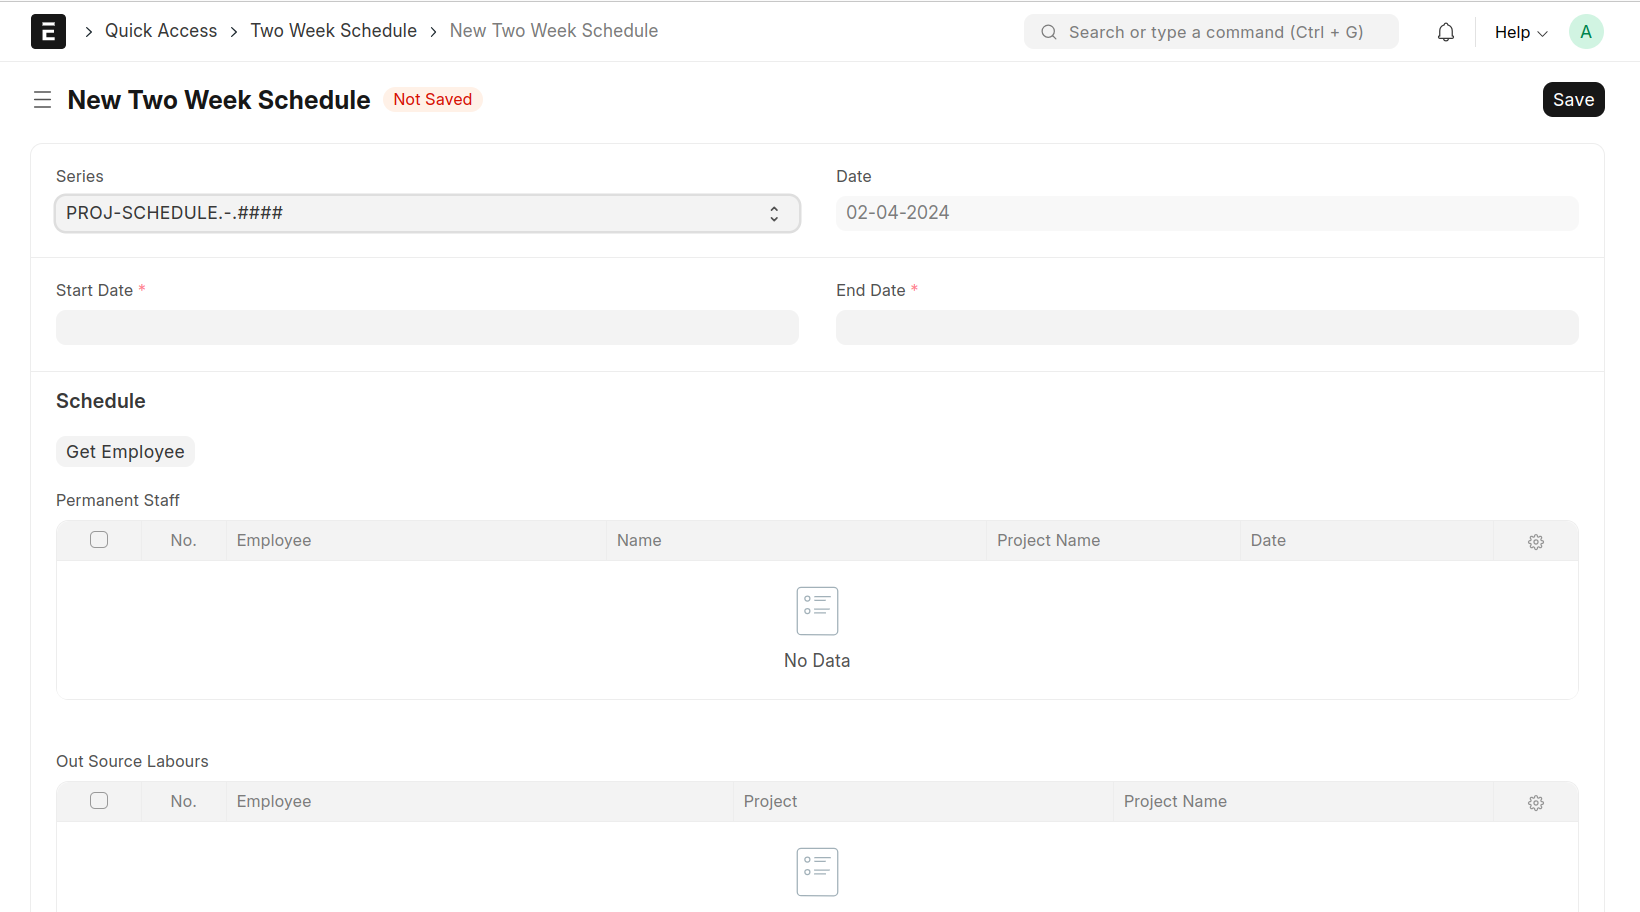
Two Week Schedule
Create A Two Week Schedule
This Document Is Used To Find The Employee's Project Schedule Between Specific Dates
Select The Start Date And End Date and Press The Button 'Get Employee' Then Show The Employee's Work Schedule Between The Dates
You Can Also Add The Outsource Employee Details In The 'Outsource Labour's' Table
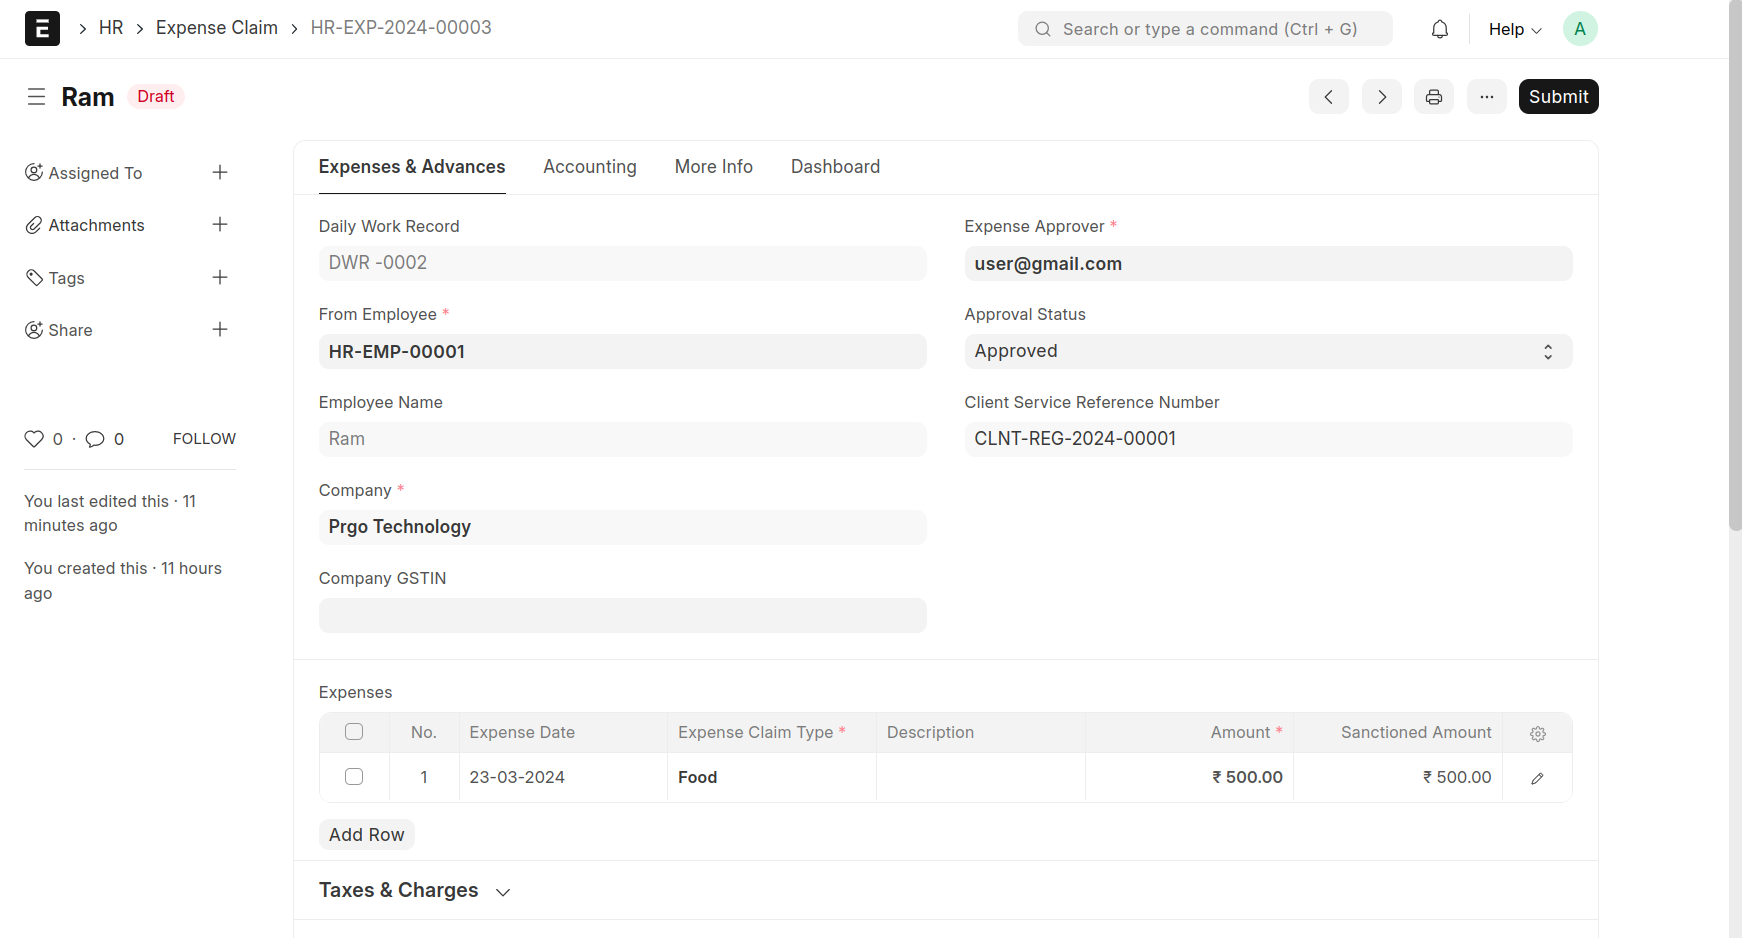
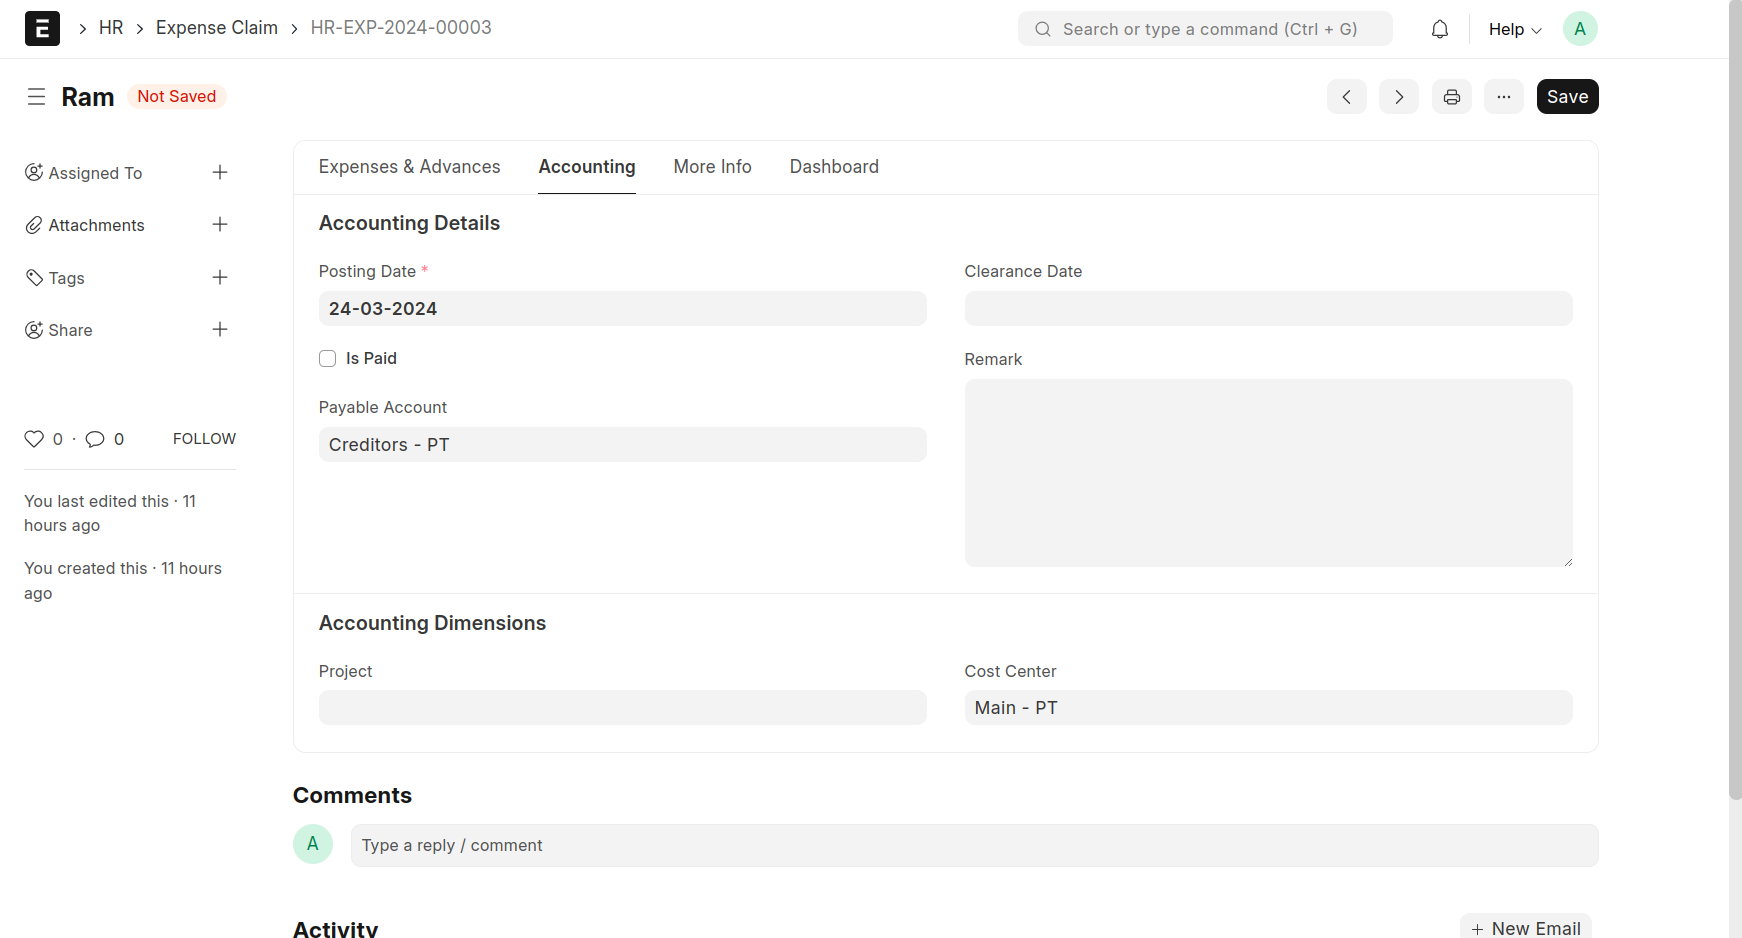
Expense Claim
When The 'Daily Work Record' Is Submitted, Expense Claims Are Generated. Those Expense Claim Details Are Shown On The 'Expense Claim' Document.
Open The Draft Document and Enter The Sanctioned Amount, Change The Approval Status To Approved, And
Select The Payable Account. Then Save And Submit
That Time Approved Amount And Details Will Show On The Client Service or Project Execution Plan (Selected On The Daily Work Record)

Additional Salary
Open Additional Salary And Create New Additional Salary
This Document Is Used To Approve The Additional Salary Of A Employee
Select Employee. Then Select Start Date And End Date and Press The Button 'Fetch Attendance Request' Then Show The Employee's Overtime Attendance Details Between The Dates
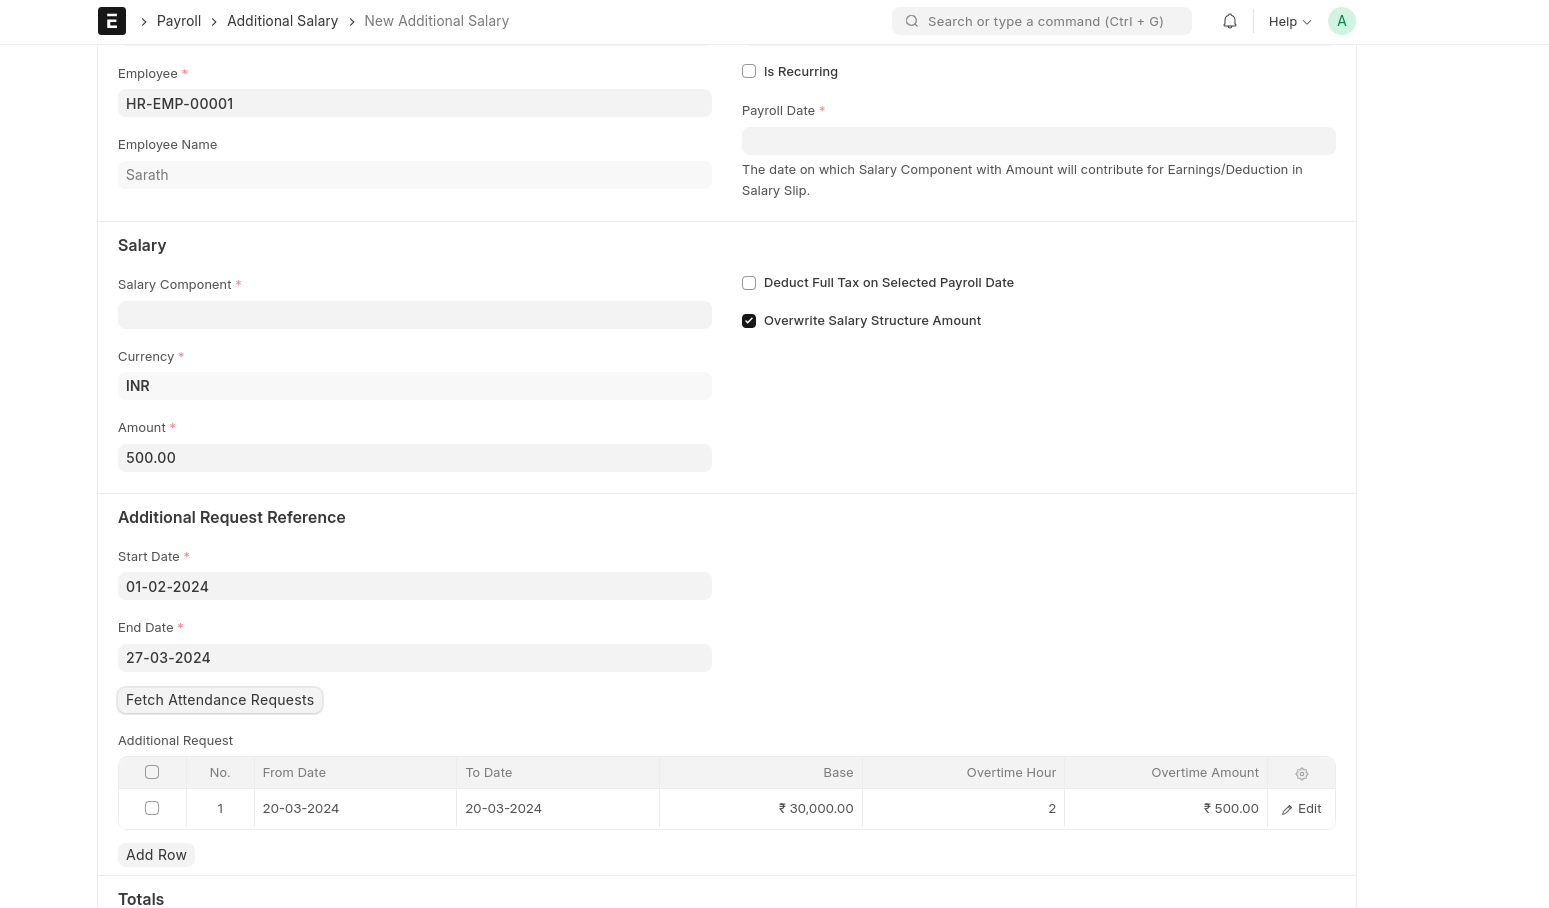
Then Fill The Mandatory Fields And Submit The Document
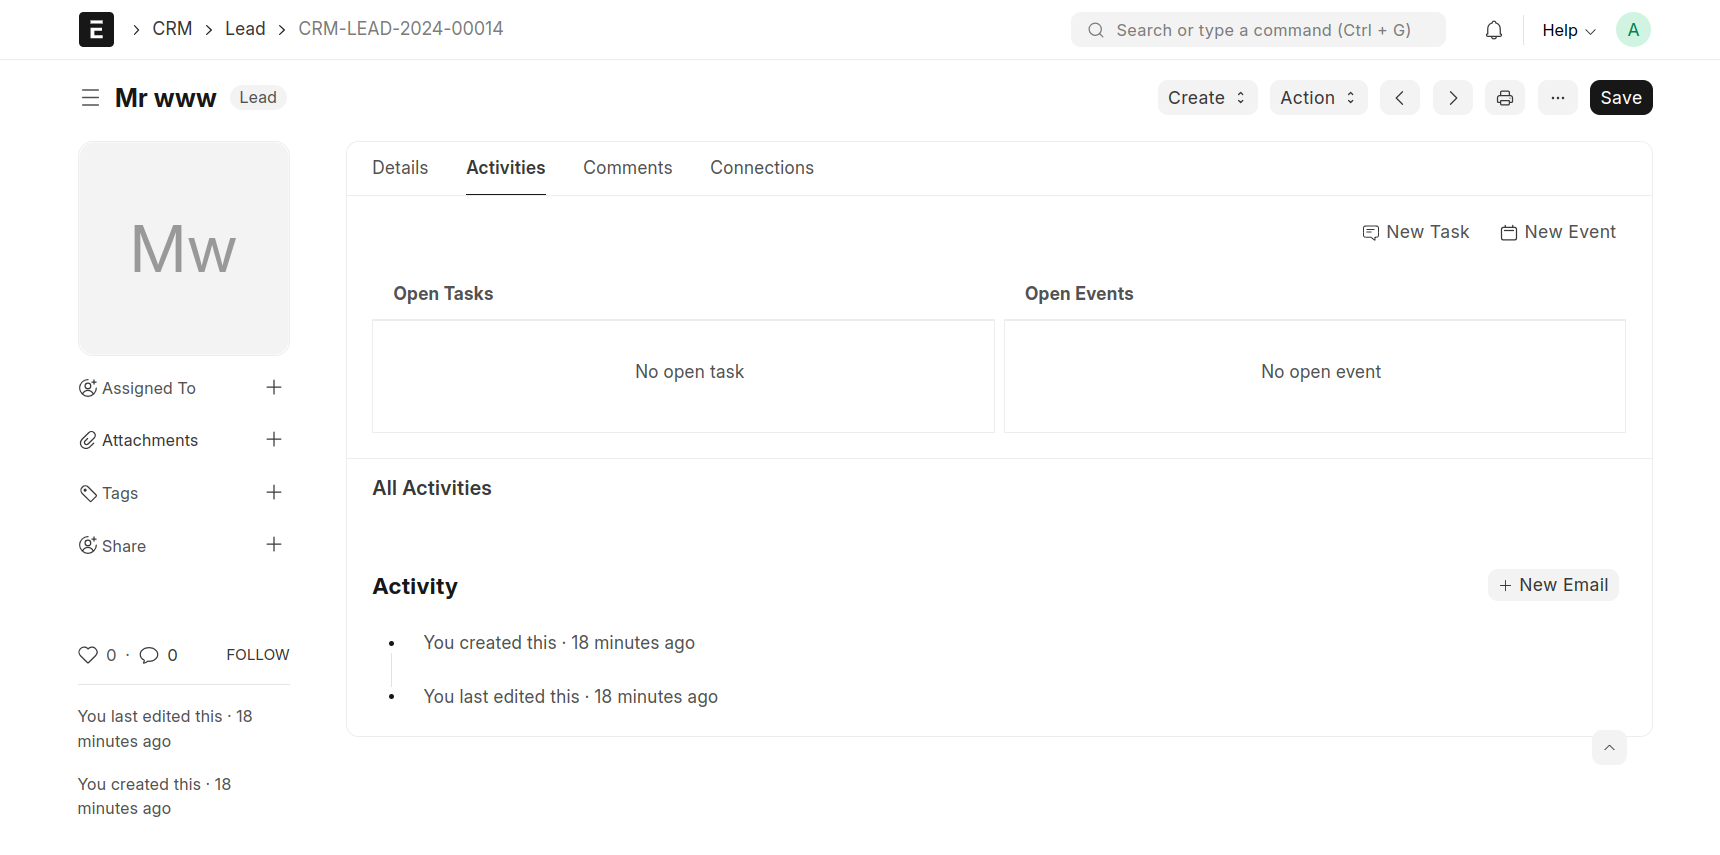
Google Calendar Integration With Lead
Create A Lead And We Can Add The Details(Meeting Schedule,Meeting Links etc.)In The Google Calendar.
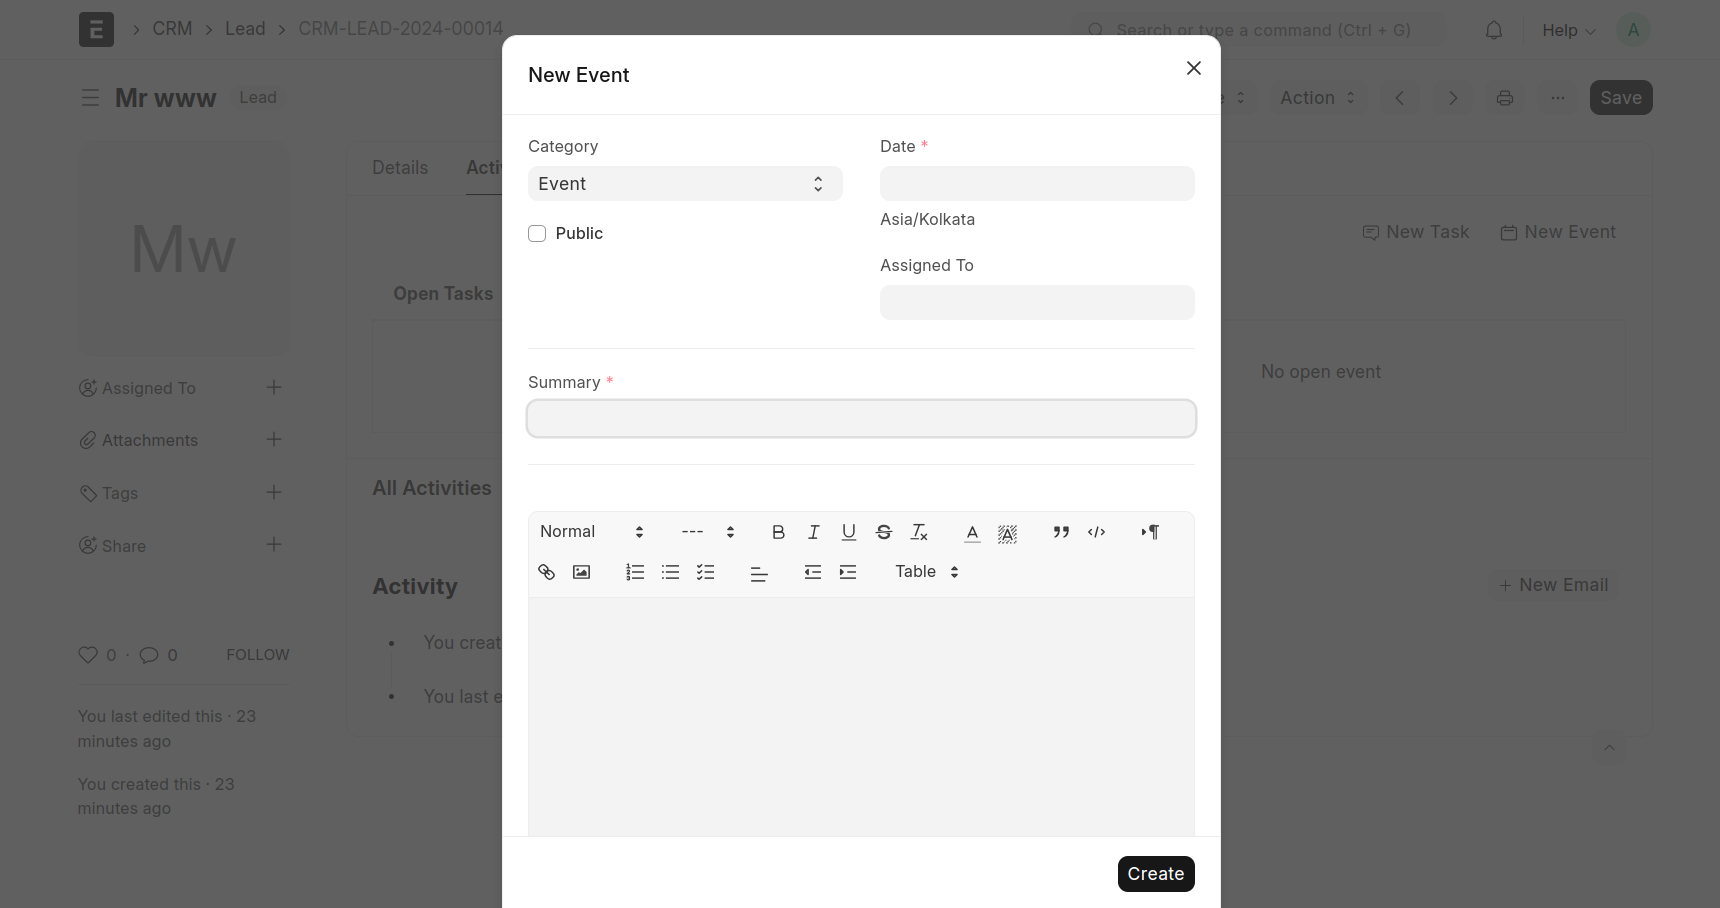
First Create A Lead And Save. Then Open The Lead And Create An New Event That Time Display The New Tab And Fill The Details Then Create
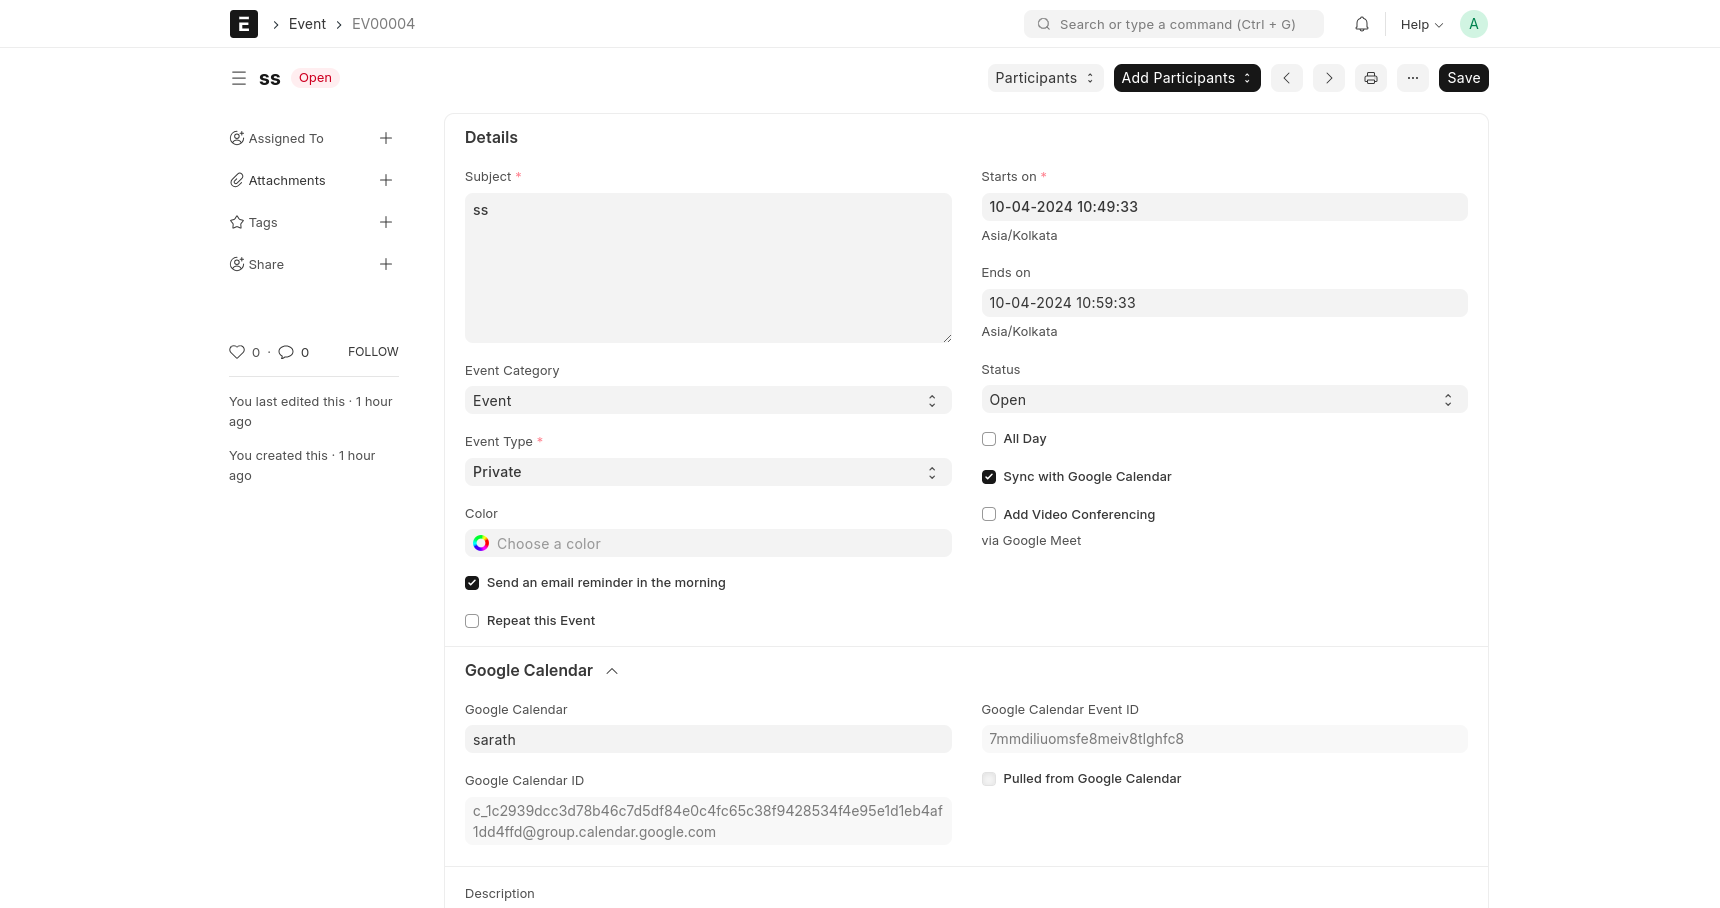
Then Open The Created Event

That Time Show The Created Event Details.Then we Can Edit The Document.Mark The Stars On Ends On Date And Tick The Check Box 'Sync with Google Calendar' Then Display The Google Calendar Section Below Then Select The Google Calendar Name And Save The Event. That Time The Event Will Mark On The Registered Google Calendar App.
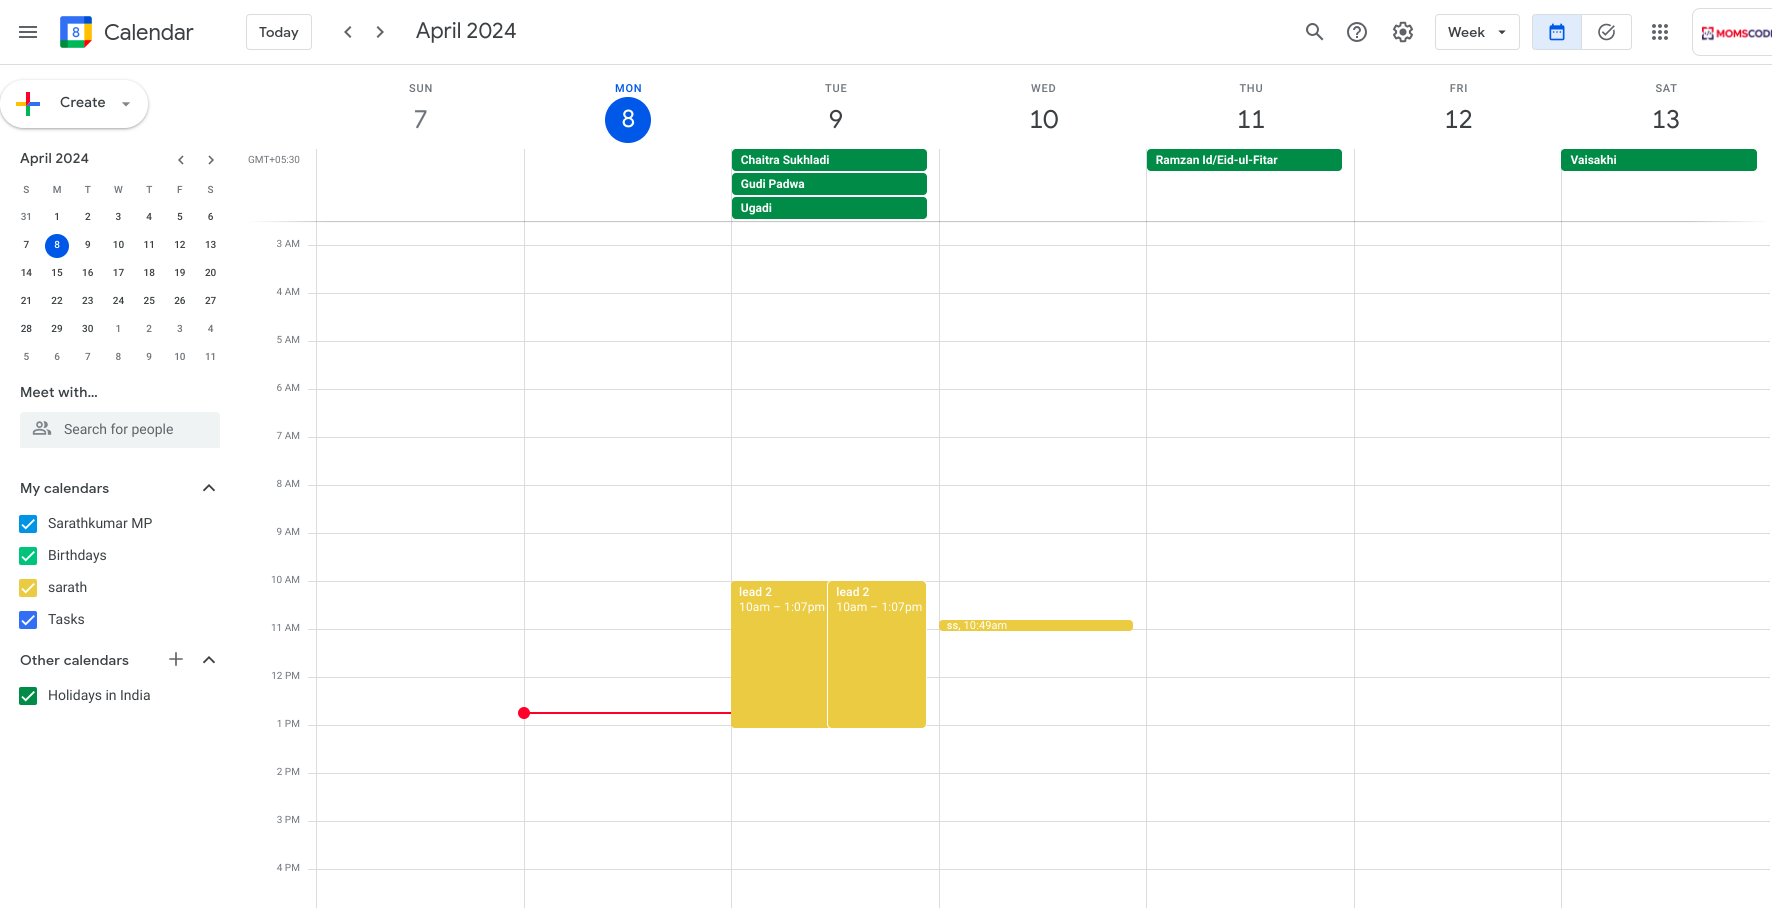
Other Method to Lead Update in Google Calendar
here a chech box named 'Sync with google calendar, tick the check box and fill the mandatory fields and save

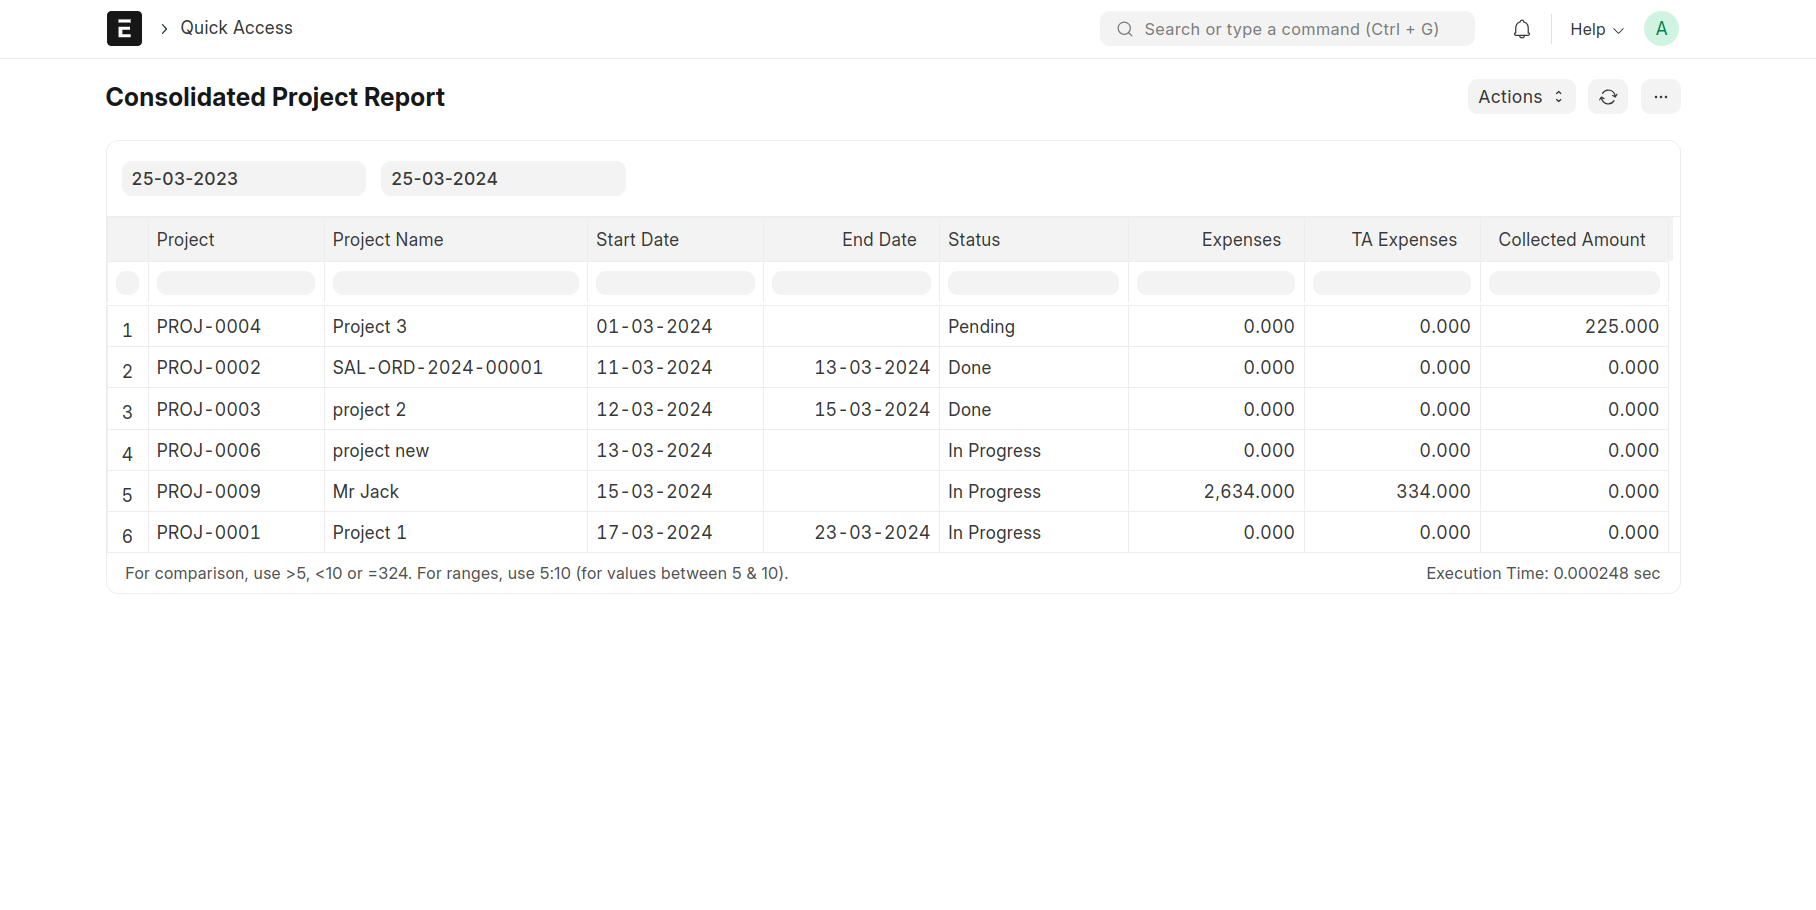
Report
- Consolidated Project Report
- Consolidated Service Report
Consolidated Project Report
This Report Is Used To Find Current Project Status And Collected Amount. Select The Date (If You Can Select Weekly, Monthly, Daily Date) Then Show The Details
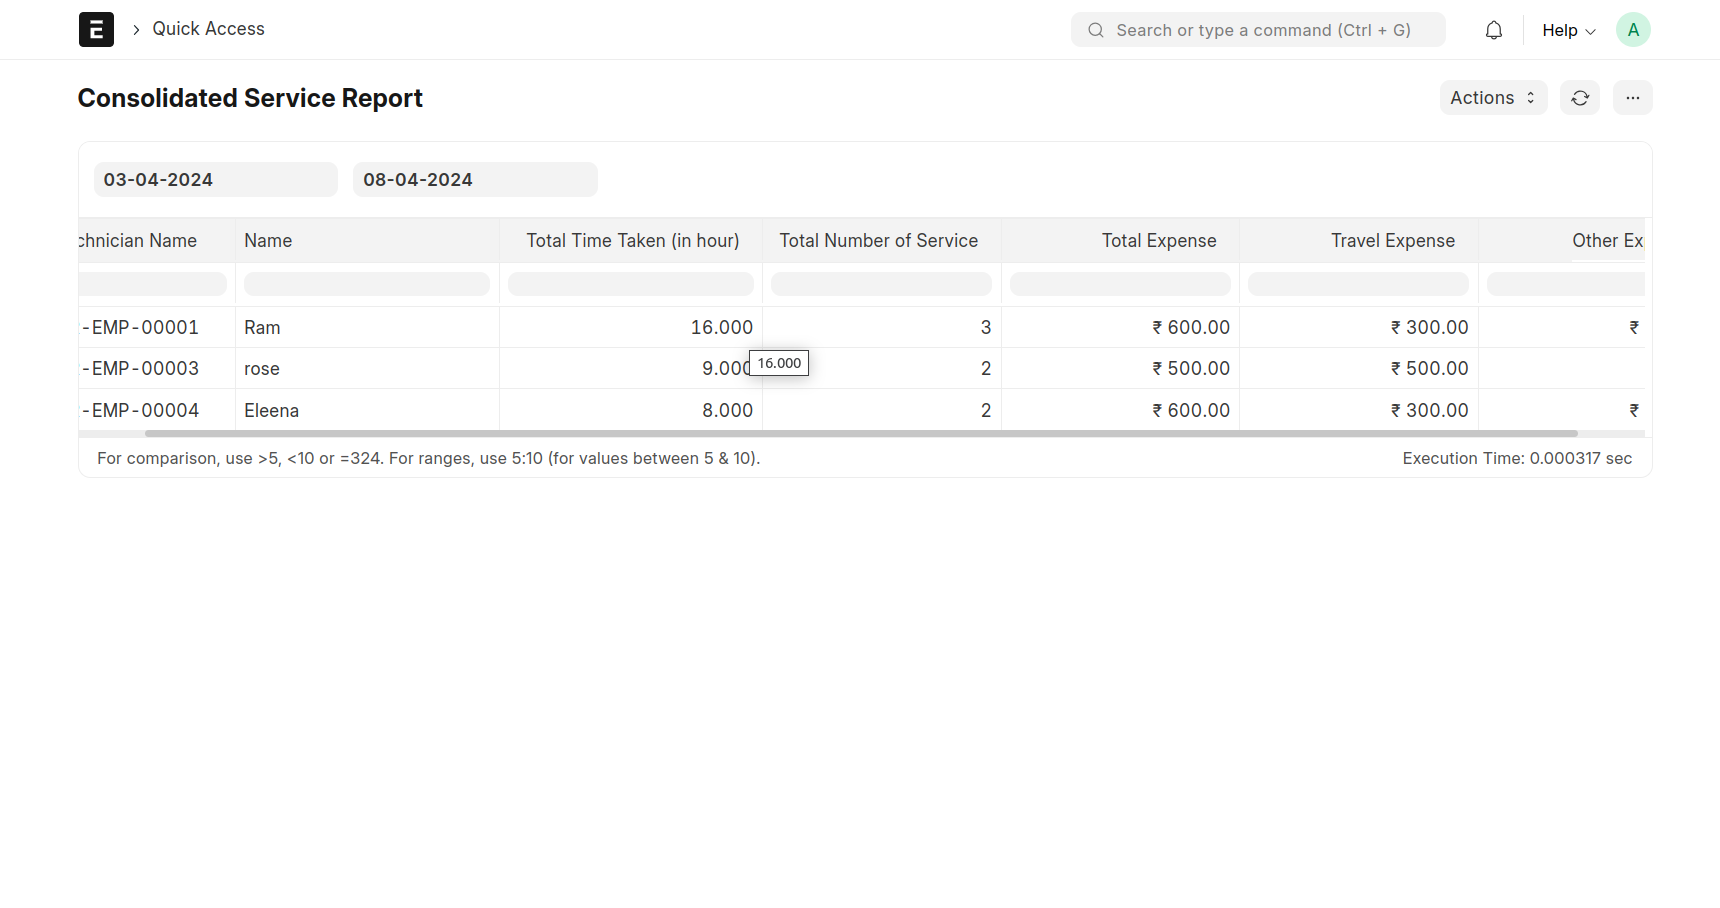
Consolidated Service Report
This Report Is Used To Find Employee Service Details. Select The Employee And Select The Date (If You Can Select Weekly, Monthly, Daily Date) Then Show The Details