Momscode - Industree Custimization
Documentation
--> First create the below mentioned doctypes based on our business process .These are one time task.
Item
Item Group
Employee
Customer
Supplier
Related Party
Operation
Product Category
Margin Items
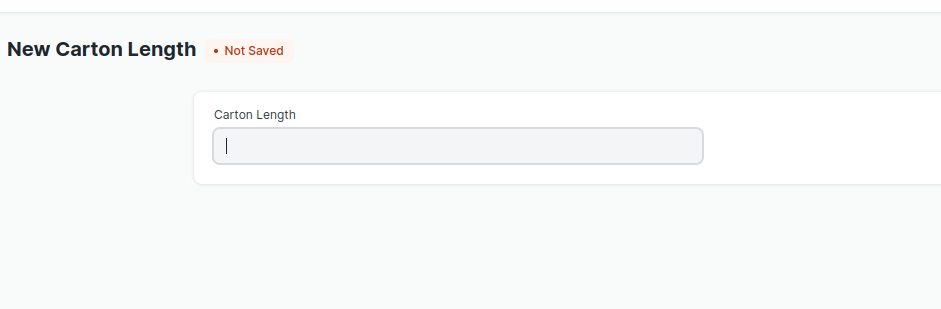
Carton Length
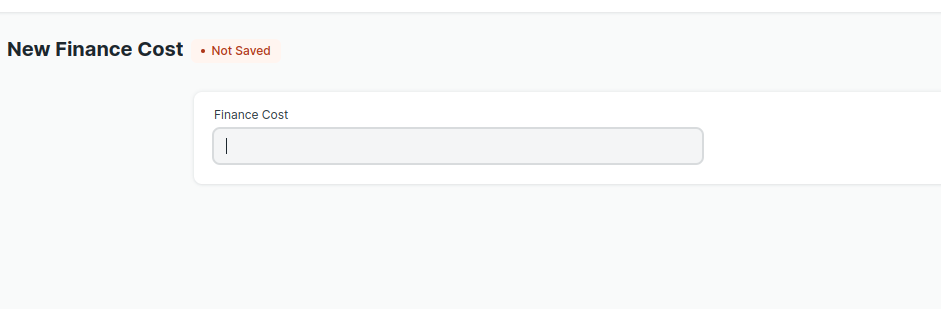
Finance Cost
Finished Good Item
Unit Location
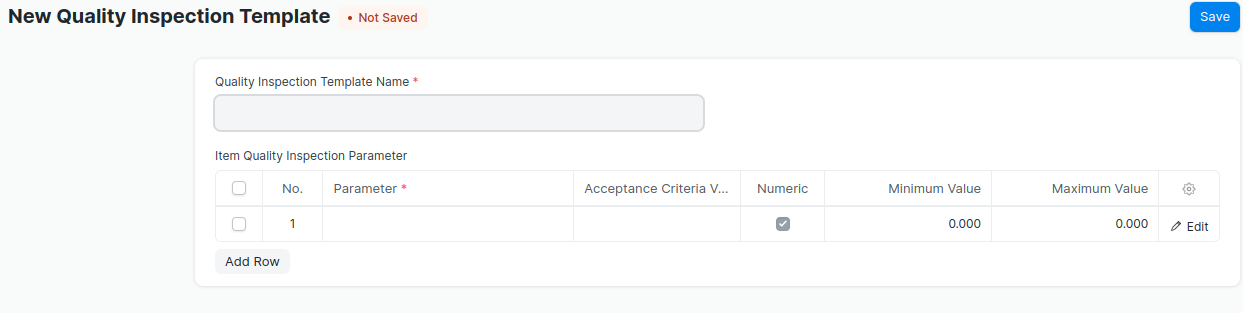
Quality Inspection Template
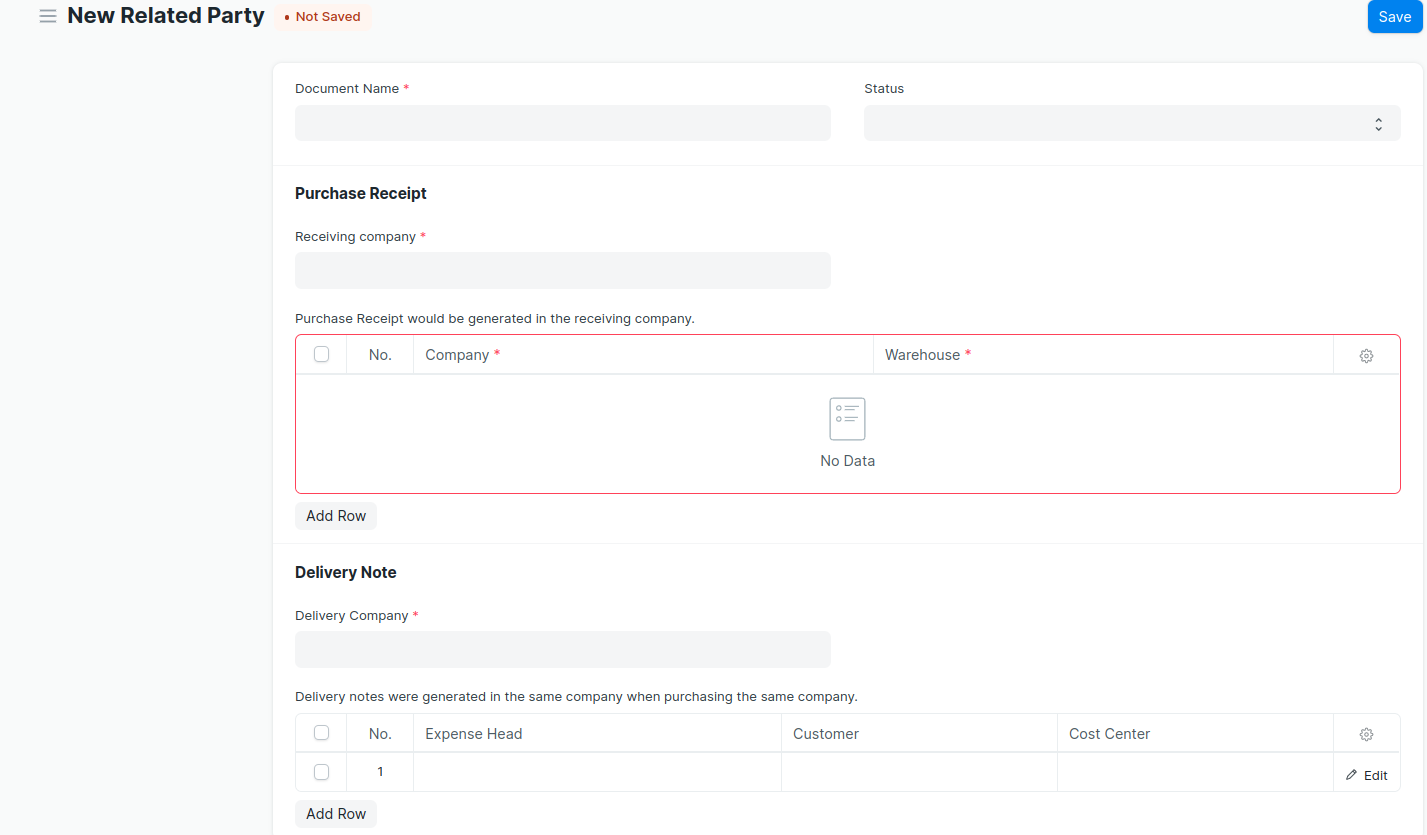
Related Party.
--> Enter the details in all the fields.
--> ‘Document Name’ field not filled by the user.It automatically fetch while saving the document.
Opeartion
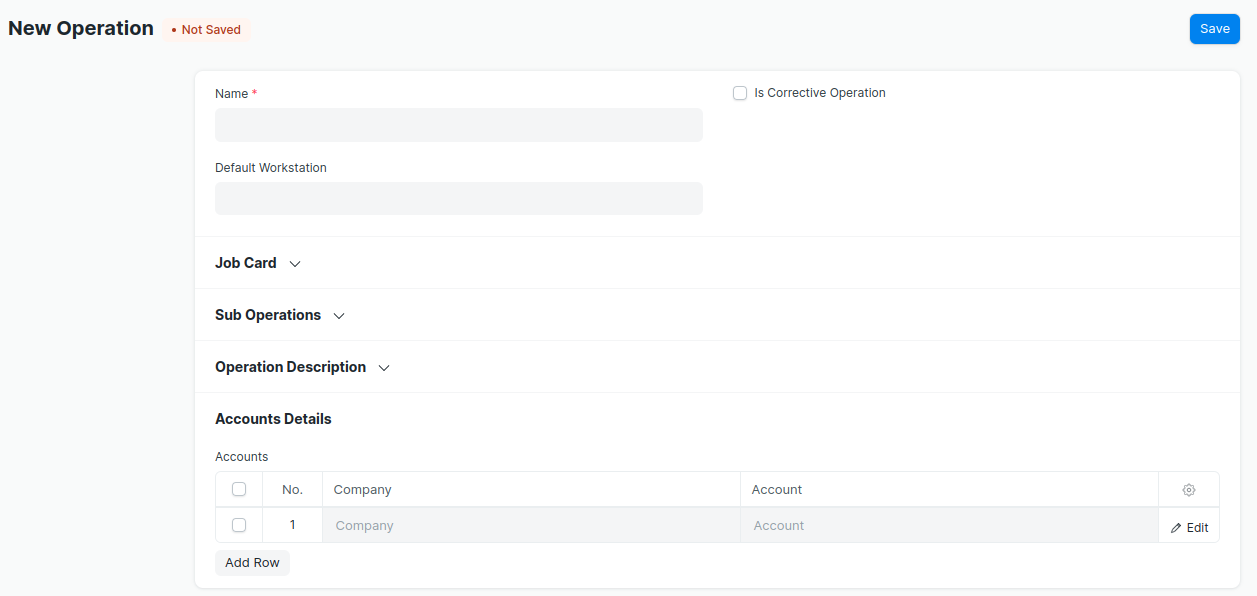
--> Enter the Operation name
--> Select the company and account in Account Details table
Product Category
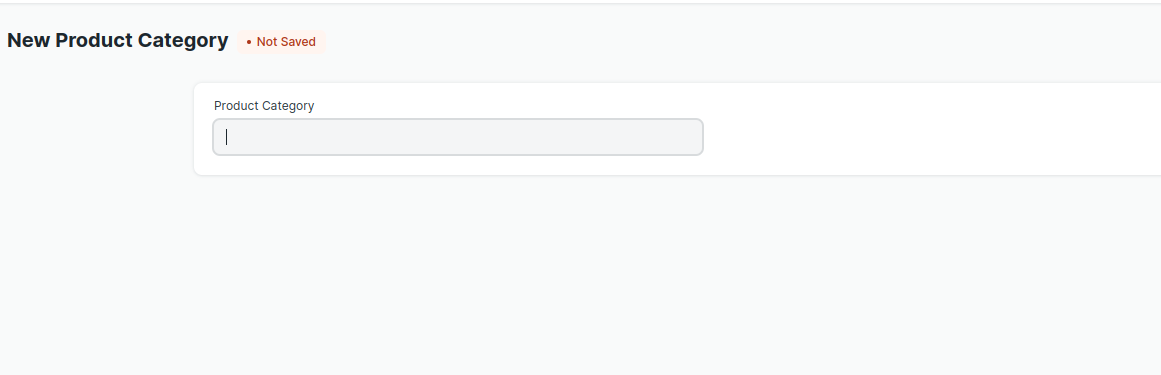
--> Enter the Product Category name.
--> Select this Product Category in Item master while creating the Item.
Margin Items.
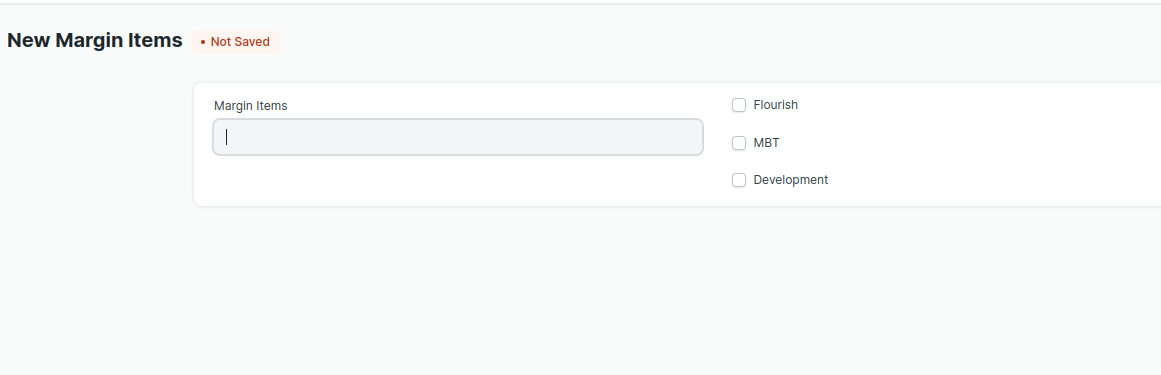
--> Enter the Margin Item.
--> Select the check box based on the item.
Carton Length.
Finance Cost.
Finished Good Item
--> Create Finished Good Item in Item master. Also create an Item Group for the Finished
good Item.
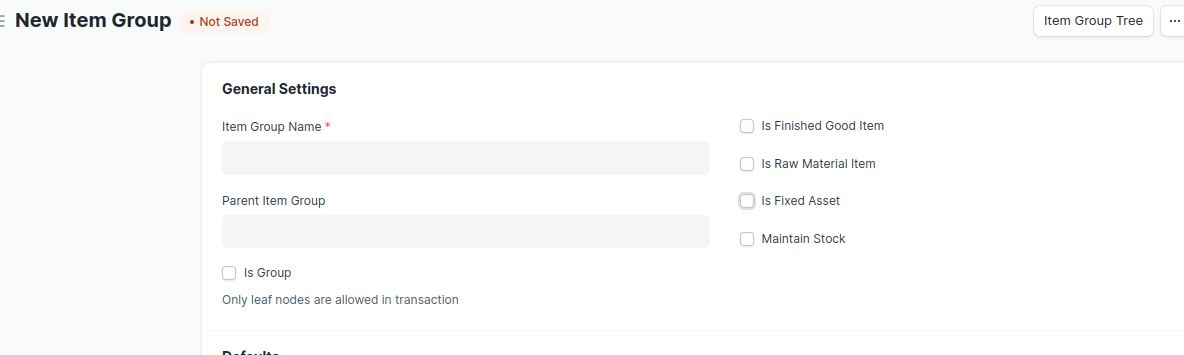
--> Select the check boxes based on the Item group.
- If the Item Group is for Finished Good Item ,then select the check box ‘is Finished
Good Item’. * If the Item Group is for Raw Material Item ,then select the check box ‘is Raw
Material Item’.
--> Then create Items in Item master.
Unit Location
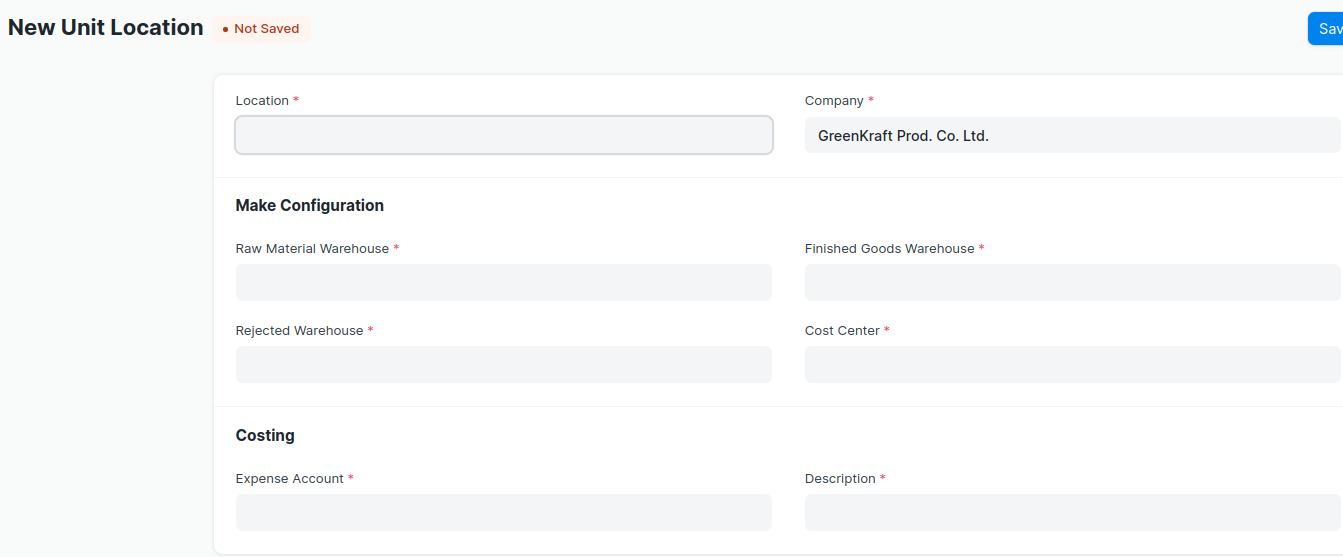
--> Enter the ‘Location’ and setup the configuration details . All are mandatory fields.
Quality Inspection Template.
Estimation
--> Create Estimation document.
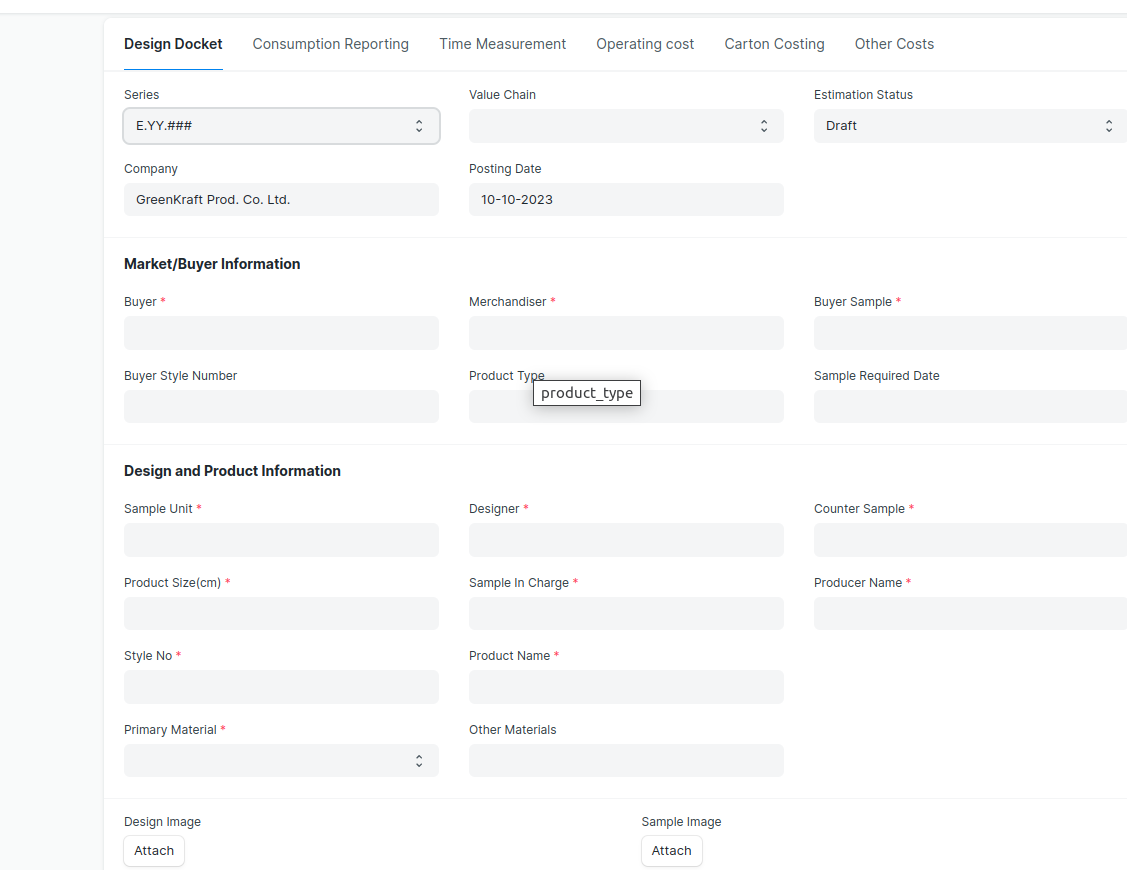
--> Enter details in all the fields
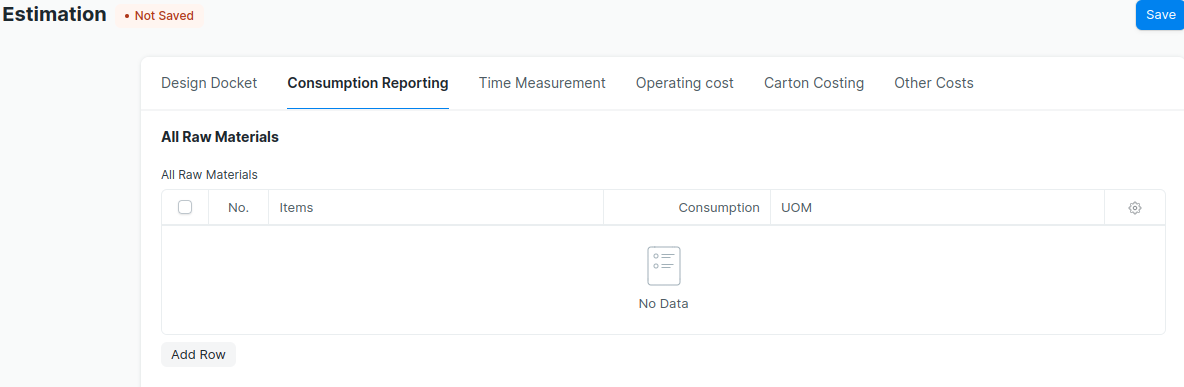
--> Select the Raw material Items and enter the consumption to the table ‘All Raw
Materials’ .
--> Select the Operations in ‘Time Details’ table.
--> Enter the time and rate.

--> Submit the Estimation document after filling all the fields and tables.
--> A BOM document is created when submitting the Estimation document.
Make
--> To prepare ‘Make’ ,first create the below documemts
Unit Location.
Quality Inspection Template.
--> Then create the ‘Make’ document.
--> First select the ‘Company’ and ‘Location’.
--> Go to the ‘Wages Details ‘ table,
--> Select Producer ID.
--> Select ‘Product Code’.(Finished Good Item).
- ‘BOM’ document name created against the selected Product Code
automatically fetched. * Select the ‘Operations’ and enter the working hours .It will be calculate the ‘Total
Income’.’Total Income’ will be fetch to the ‘Costing Details’ table while saving the
document. * It also fetch the details to the tables given below,
Product Details
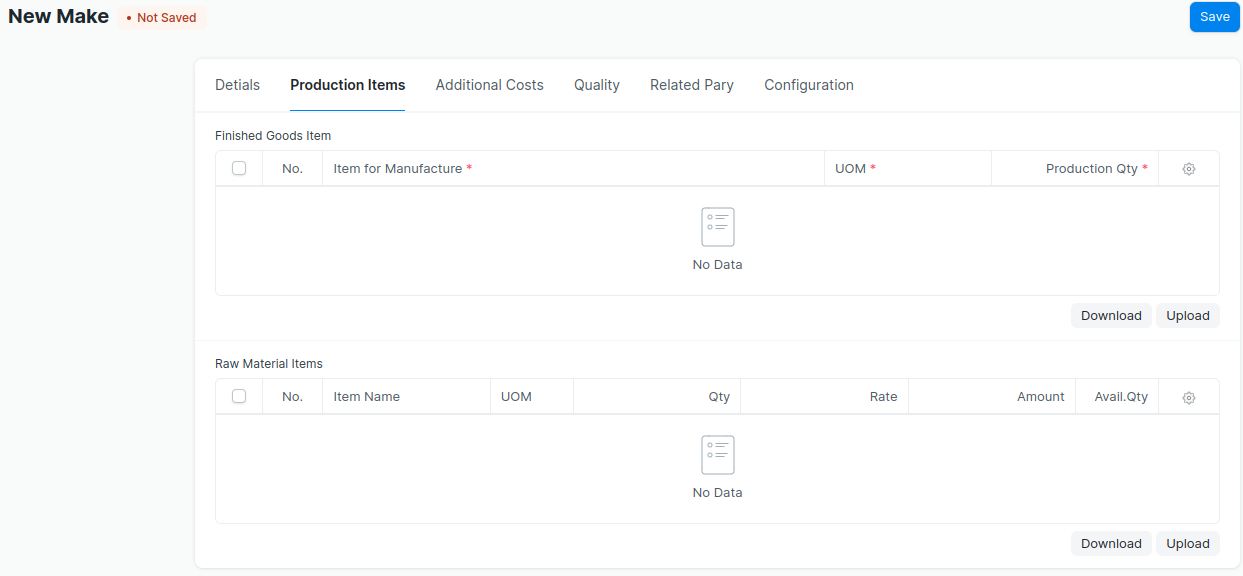
Finished Goods Item
Raw Material Items
Acceptance Criteria List
- The ‘FG Qty’ can be changed from the table ‘Product Details’.it will be changed
the quantities in the tables ‘Finished Goods Item’ and ‘Raw Materials Items’.

- Raw material items will be automatically fetched to the table ‘Raw Material
Items’ while selecting the ‘Product Code’. It also fetch:
UOM
Rate
Qty
- Calculate the Amount of each item.
--> In ‘Additional Costs’ tab ‘Operating Cost’ will be fetch to the table ‘Costing Details’
while selecting the Estimation.
--> Enter the ‘Rejected Qty in ‘Acceptance Criteria List ’ table.Based on the Rejected Qty
‘Material Transfer entry’ (Stock Entry) is created while submitting the ‘Make’ document.
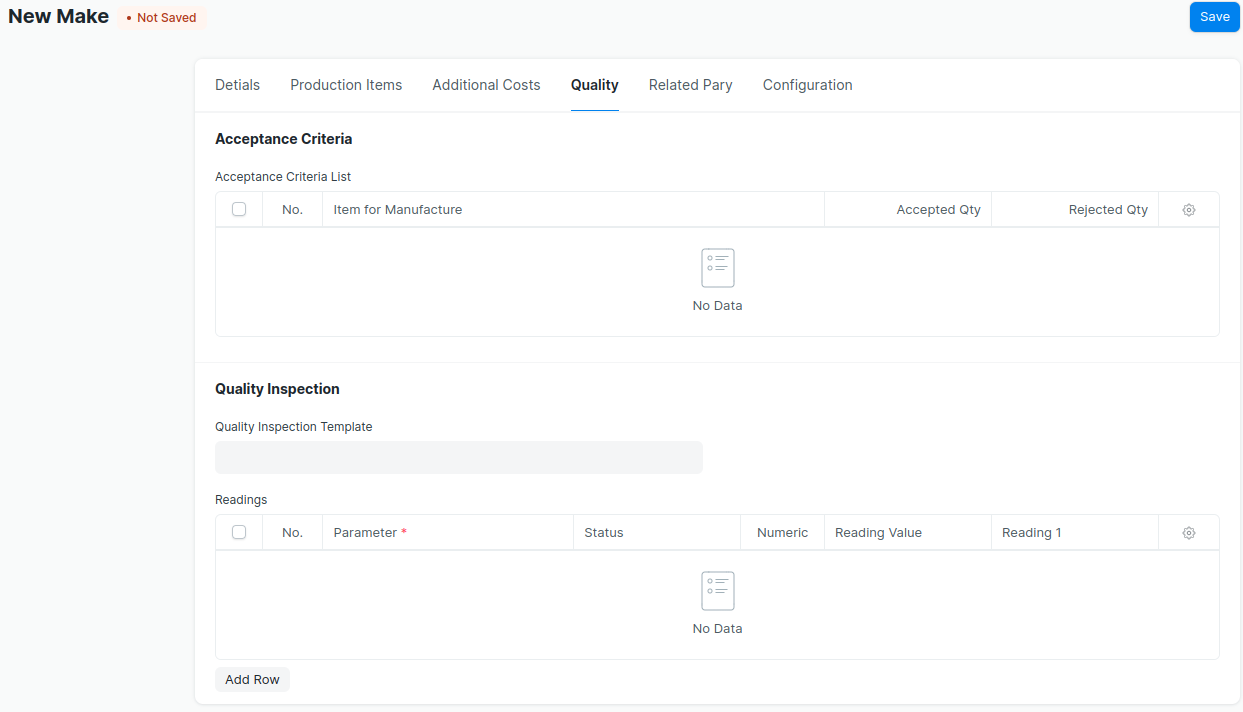
--> Select ‘Quality Inspection Template’ .
--> Enter data in to the ‘Readings’ table . Based on this details a ‘Quality Inspection’
document is created while submitting the ‘Make‘ document.
Note: The below documents will created while submitting the ‘Make’ document.
- Manufacture entry (Stock Entry) will be created based on the Finished Good items
selected in ‘Make’.
- Material Transfer entry (Stock Entry) will be created based on the rejected quanity in
acceptance criteria list table.
- Quality Inspection document will be created based on the selection of Quality Inspection
Template.
Producer Payroll
--> Before creating Producer Payroll , create Producer Additional Salary.
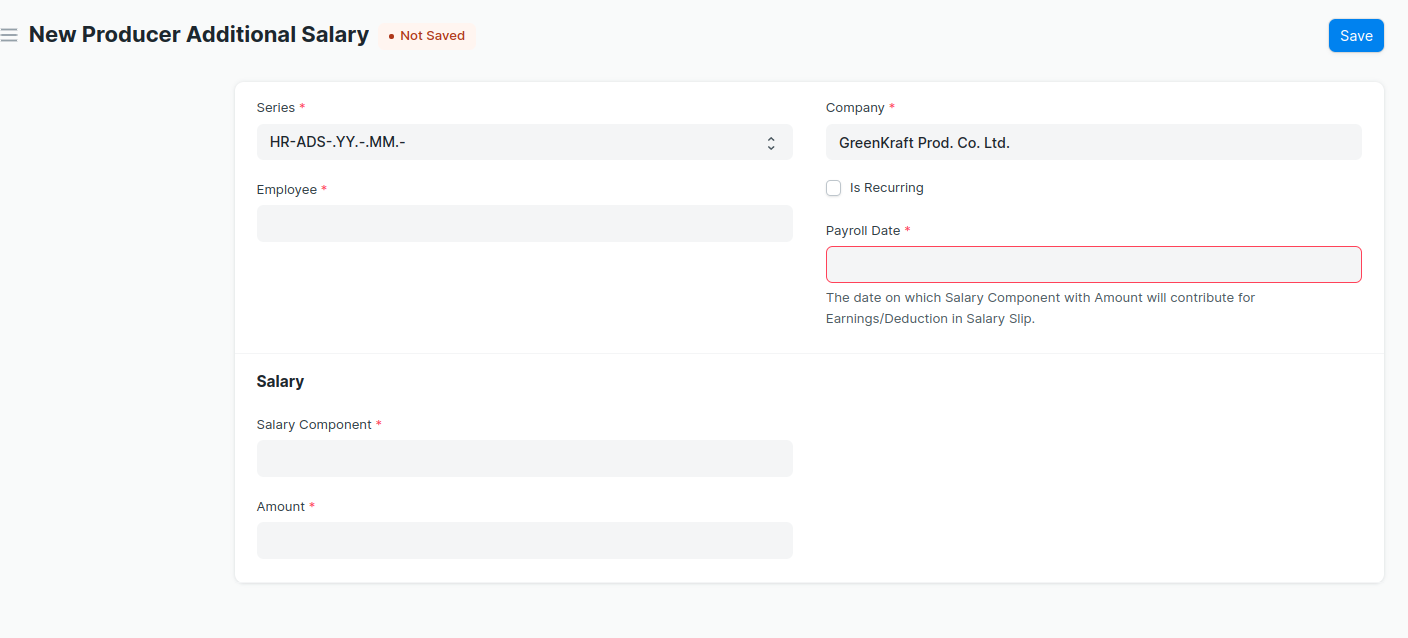
Producer Additional Salary:
--> Producer Additional Salary is to add or deduct ad hoc salary for a particular
Employee while processing the Payroll.
--> Go to Producer Additional Salary.
--> Select Employee and Salary Component.
--> Enter the amount.
--> Enter the Payroll Date. If Payroll Date for Producer Additional Salary is in the
interval when the salary is processed, it will be added to the earnings/deduction.
--> Save and Submit.
Then Create Producer Payroll.
--> Go to to Producer Payroll list, click on New.
--> Select Company and Payroll Frequency.
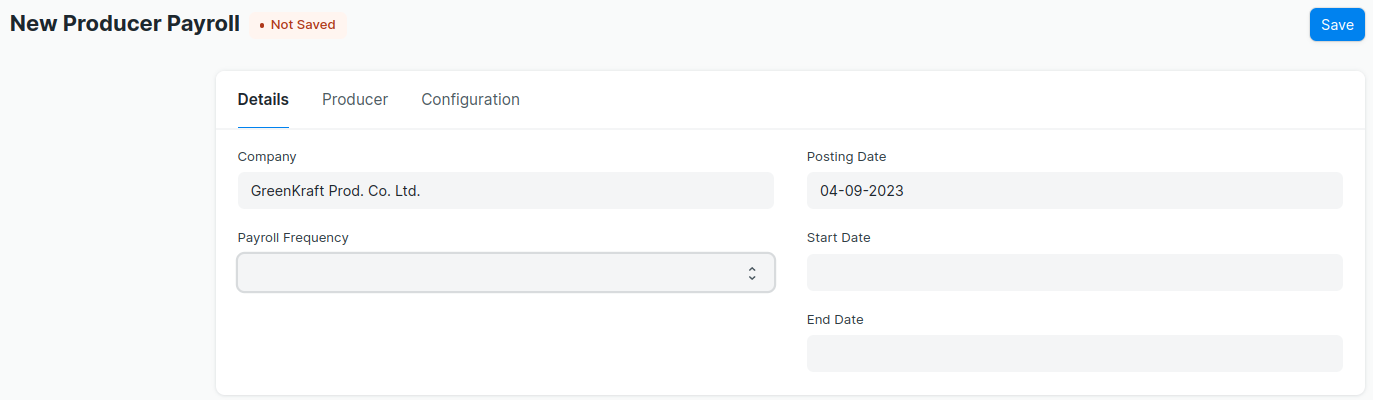
--> Then Save the document.
-->Once the information is saved, click on the ‘Get Employees’ button to get a list of
Employees for which the Producer Slips will be created based on the selected criteria.
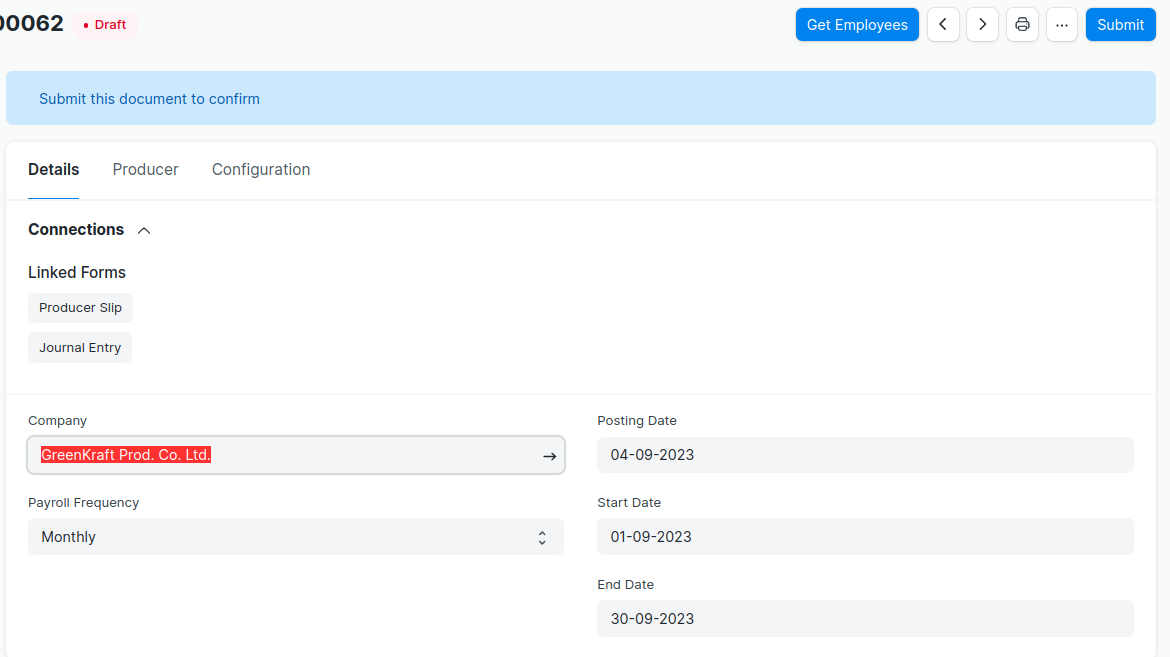
--> Once the list of Employees is fetched, click on the ‘Create Producer Slip’ button to
generate Producer Slips.
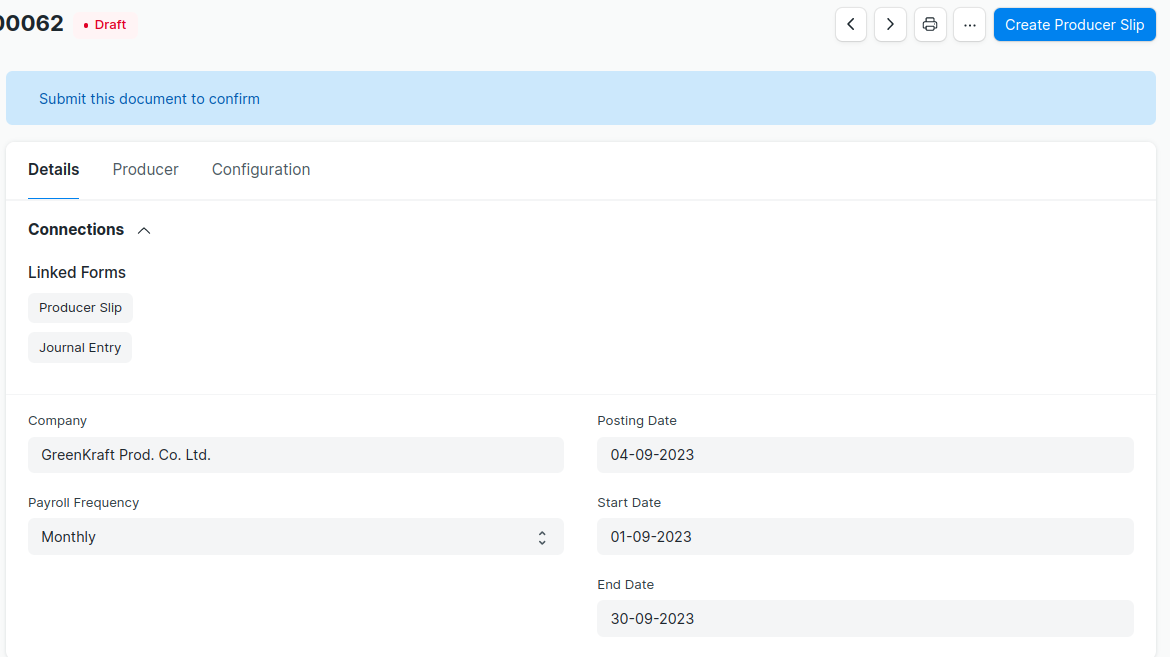
Note: If the Producer Slips are already created, the system will not create any more
Producer Slips.
--> After verifying the Producer Slips, you can Submit them all together by clicking on the
Submit button in Producer Payroll. It will create Journal Entry.
--> Submitting Producer Slips one by one manually will not create the Journal Entry to
record salary accrual.
- Before creating Purchase Receipt and Delivery Note , you will create Related Party document.That is one time task.
Purchase Receipt
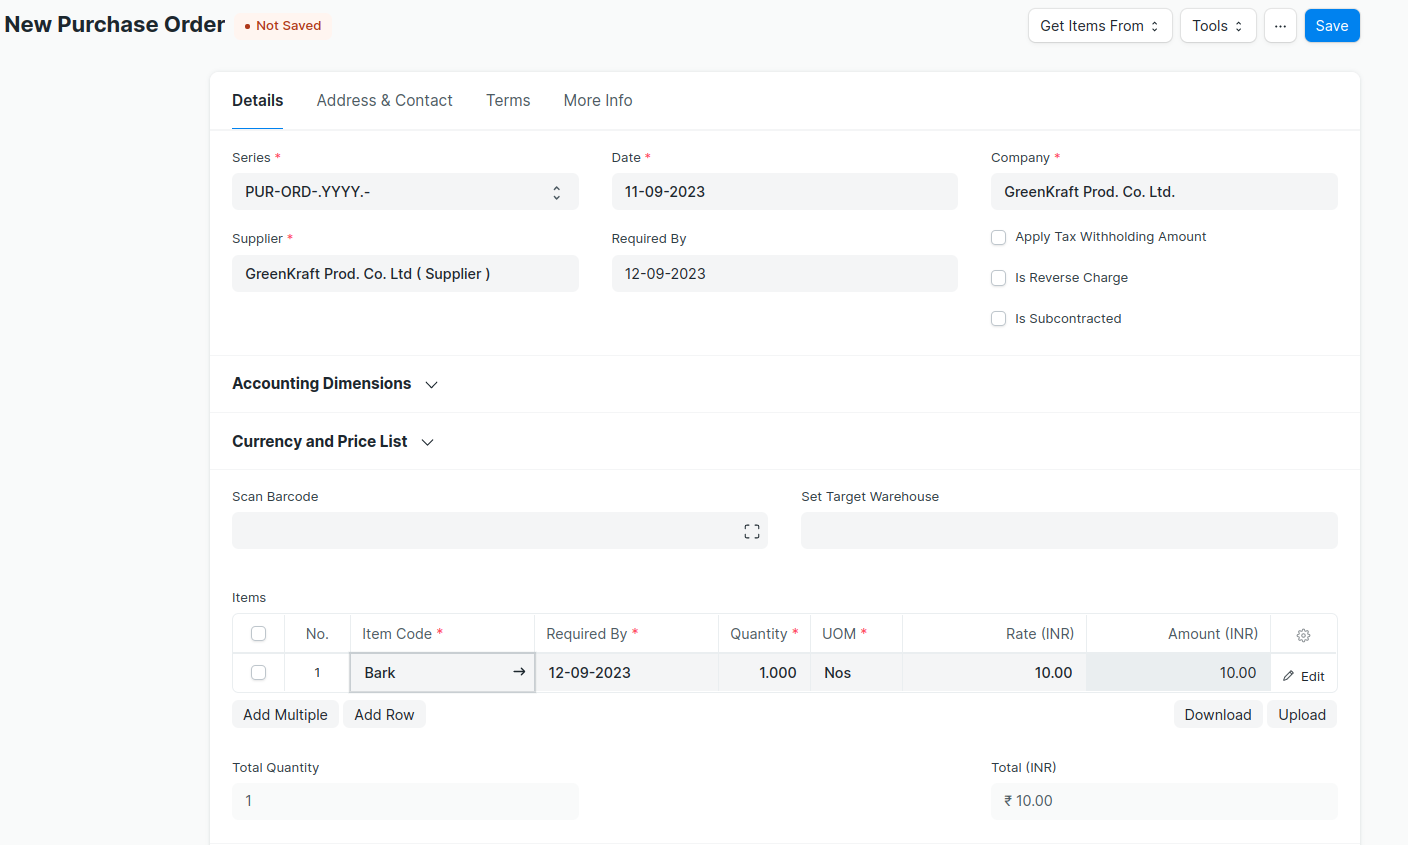
--> Create Purchase Order
--> A Purchase Order is a binding contract with your Supplier that you promise to buy a set
of items under given conditions.
--> Before creating and using a Purchase Order, you create the following first:
Supplier
--> To create Purchase Order
--> Go to the Purchase Order list, click on New.
--> Select the Supplier, required by date.
--> In the items table, select the item by code, you can change the required by date for
each item.
--> Set the quantity and the price will be fetched automatically if set in the Item master.
--> Set taxes.
--> Save and Submit.
--> Then create Purchase Receipt
--> A Purchase Receipt is usually created from a Purchase Order. In the Purchase Order,
click on Create --> Purchase Receipt.
--> To create a Purchase Receipt manually, follow these steps:
--> Go to the Purchase Receipt list, click on New.
--> Select Company,Supplier and Items.
--> You can set the Accepted Warehouse for all items in this Purchase Receipt.
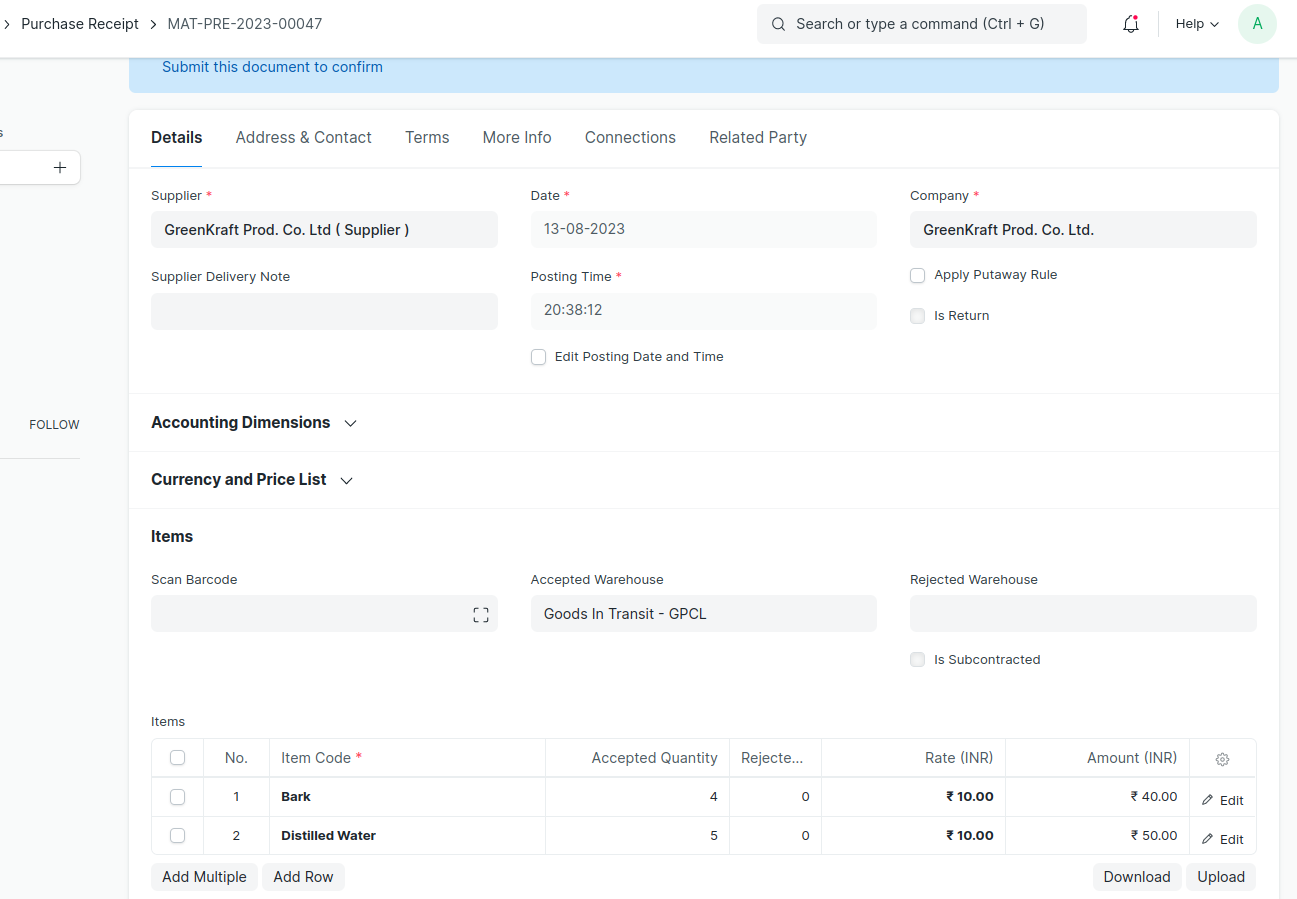
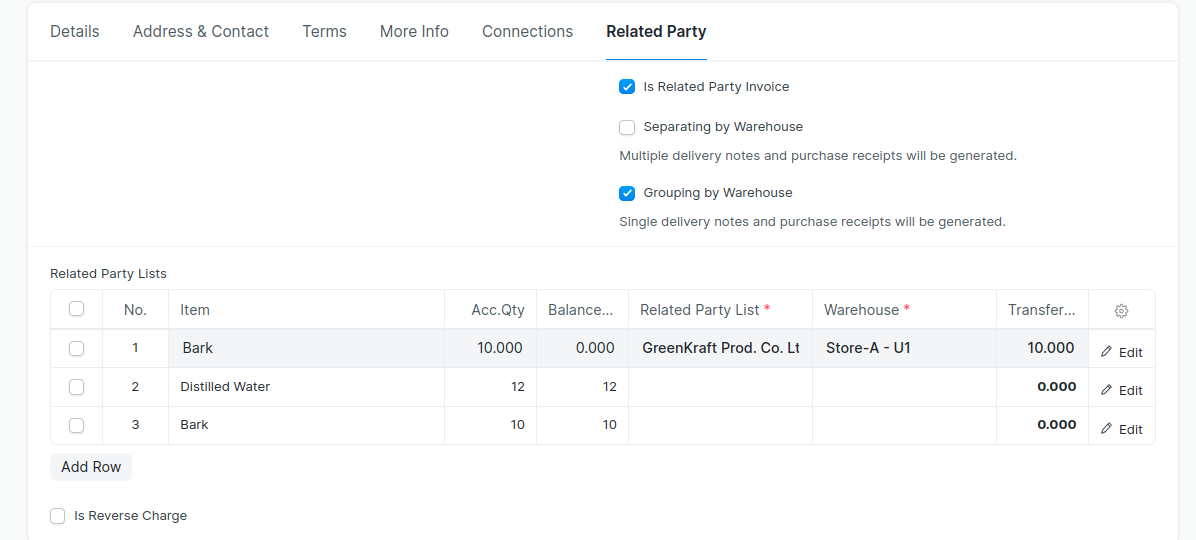
--> Go to Related Party tab
--> Select ‘Is Related Party Invoice’ checkbox.The items in the ‘Item‘ table will be fetch
automatically into the ‘Related Party Lists’ table while selecting ‘Is Related Party
Invoice’.
--> You can also manually select the items into ‘Related Party Lists’ table.
--> Select any one of the option (Separating by warehouse or Grouping by Warehouse)
below ‘Is Related Party Invoice’ field based on the warehouse.
--> Select ‘Related Party’ and ’Warehouse’ from table ‘Related Party Lists’.
--> Enter the ‘Transfer Qty’.
--> Based on the selection of warehouse , it will be create Purchase Receipts and Delivery
notes while submitting the document.
Delivery Note
--> A Delivery Note is made when a shipment is shipped from the company’s Warehouse
to the customer.
--> To create Delivery Note
--> Go to the Delivery Note list, click on New.
--> Select Customer,Company and Item details.
--> Select Source Warehouse.
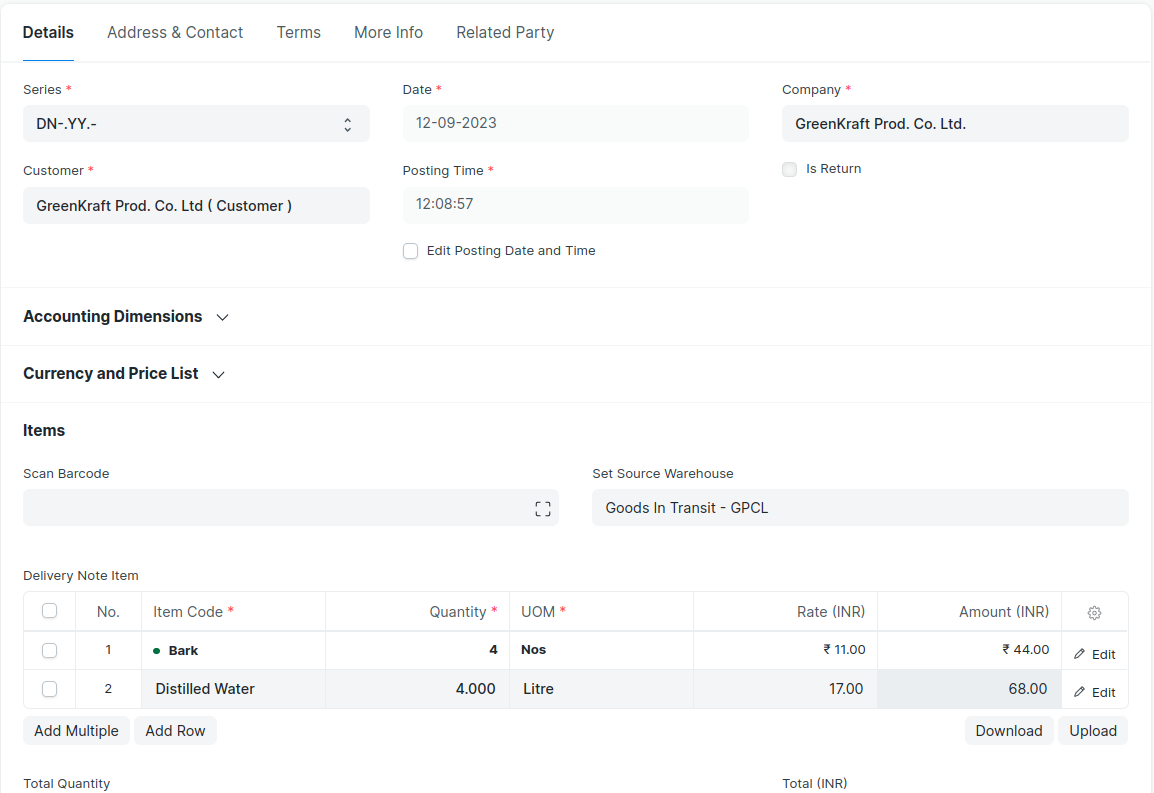
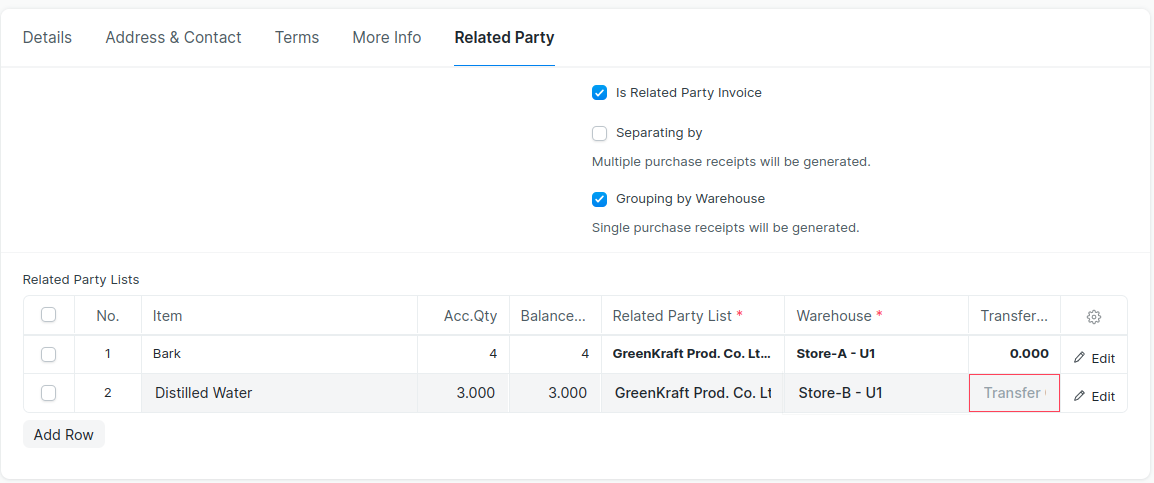
--> Go to ‘Related Party’ Tab.
--> Select ‘Is Related Party Invoice’ checkbox.The items in the ‘Item‘ table will be fetch
automatically into the ‘Related Party Lists’ table while selecting ‘Is Related Party
Invoice’.
--> You can also manually select the items into ‘Related Party Lists’ table.
--> Select any one of the option (Separating by warehouse or Grouping by Warehouse)
below ‘Is Related Party Invoice’ field based on the warehouse.
--> Select ‘Related Party’ and ’Warehouse’ from table ‘Related Party Lists’.
--> Enter the ‘Transfer Qty’.
--> Based on the selection of warehouse , it will be create Purchase Receipts
while submitting the Delivery Note document.
Purchase Receipt
-> Another customization done for the inter company transaction to book the expense ->add a custo field 'customstockreceivedbutnot_billed' linked to the Stock Received But Not Billed account of the company